【Algorithm】[프머] DP - N으로 표현

1. 첫번째 코드 - DFS

알고리즘 프로그래머스 P2

  • first.py의 문제점 (44점)
    1. DFS 는 복잡하다. BFS 사용하자 -> 해결 NO
    2. 33 + 33 는 해결하지 못한다 -> 해결 YES ```python

      DFS 는 복잡하다. BFS 사용하자

      def solution(N, number): array = [10] * 32001 mark = [0] * 32001 temp = [1,11,111,1111,11111]

    def dynamic(checkN, count, i): if not(0<checkN <32001) : return if count > 8 : return # if mark[checkN] == i: # return if count > array[number]: return

      array[checkN] = count
      mark[checkN] = i
    
      if checkN == number:
          print(array[number], mark[checkN])
          return
      else:
          dynamic(checkN+N, count+1, i)
          dynamic(checkN-N, count+1, i)
          dynamic(checkN*N, count+1, i)
          dynamic(checkN//N, count+1, i)
    

    l = 5 if N < 3 else 4 for i in range(1,l): start = temp[i-1] * N dynamic(start, i, i)

    answer = array[number] if array[number] < 9 else -1 return answer

if name == “main”: print(solution(5,12))


# 2. 두번쨰 코드 - DFS
![image](https://user-images.githubusercontent.com/46951365/95305692-4be5e500-08c1-11eb-9629-ab6c6cc50af4.png)
- second.py의 문제점 (77점)
    1. 8을 return 해도 된는가               -> 7까지만 return 하도록 하면, 점수 떨어짐. 즉 8 return해야 함.
    2. 5, 26 = 5*5 + 5/5 로써 4가 답으로 나와야 함. But 나의 코드는 5가 나옴. ) "((5*5)+5)/5)"식으로 연산이 이뤄지기 떄문이다.
```python
def solution(N, number):
    array = [10] * 32001
    esses = [N*i for i in [1,11,111,1111,11111] if N*i < 32001]  # good
    print(esses)
    
    def dynamic(checkN, count):
        if not(0<checkN <32001) :
            return
        if count > 8 :  # 8도 return 가능
            return
        if count > array[number]:
            return
    
        array[checkN] = count

        if checkN == number:
            return
        else:
            for j, nu in enumerate(esses):
                dynamic(checkN+nu, count+j+1)
                dynamic(checkN-nu, count+j+1)
                dynamic(checkN*nu, count+j+1)
                dynamic(checkN//nu, count+j+1)

    for i, num in enumerate(esses):     # good
        dynamic(num, i+1)
    
    answer = array[number] if array[number]  < 9 else -1    # 8도 return 가능
    return answer


if __name__ == "__main__":
    print(solution(5,26))

3. 세번쨰 코드 - Danamic programming

  • 정답 참조 링크는 게시물 맨 위에 있음.
  • Danamic programming 문제를 풀기 위해서는 재귀식을 세우는게 가장 중요하다.
  • 핵심 재귀식은 다음과 같다.
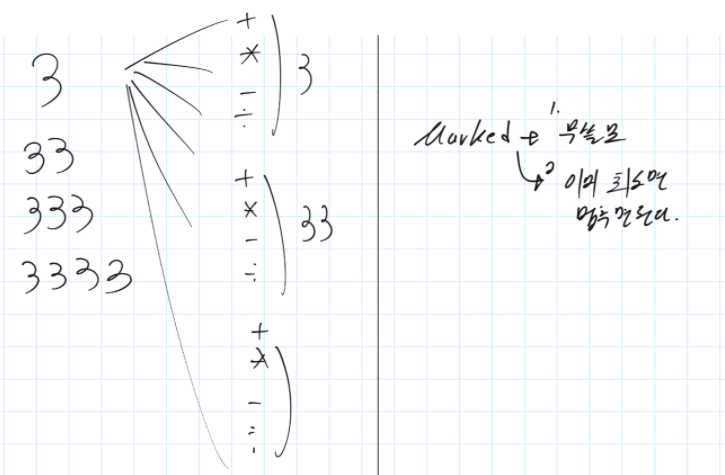
      N을 n번 사용해서 만들 수 있는 수 :
          N을 n번 연달아서 사용할 수 있는 수 U(합집합)
          N을 1번 사용했을 때 SET 과 n-1번 사용했을 때 SET을 사칙연산한 수들의 집합 U
          N을 2번 사용했을 때 SET 과 n-2번 사용했을 때 SET을 사칙연산한 수들의 집합 U
          ... U
          N을 n-1번 사용했을 때 SET 과 1번 사용했을 때 SET을 사칙연산한 수들의 집합
    
  • 나의 손코딩

  • 나의 코드
def solution(N, number):
    S = [0]
    for i in range(1,9):
        S.append({int(str(N)*i)})
    for i in range(1,9):
        for j in range(1,i):
            print(i,j,i-j)
            # set은 순서가 없기 때문에 list로 바꿔서 for해야하는 줄 알았는데 
            # 이런 방법으로 set내부의 모든 원소에 쉽게 접근할 수 있다. dict도 마찬가지 이다. 
            for num1 in S[j]: 
                for num2 in S[i-j]:
                    S[i].add(num1+num2)
                    S[i].add(num1-num2)
                    S[i].add(num1*num2)
                    if num2 != 0:
                        S[i].add(num1//num2)
        if number in S[i]:
            return i
    return -1


if __name__ == "__main__":
    print(solution(5,))

"""
위의 print로 나오는 수
2 1 1
3 1 2
3 2 1
4 1 3
4 2 2
4 3 1
5 1 4
5 2 3
5 3 2
5 4 1
6 1 5
6 2 4
6 3 3
6 4 2
6 5 1
7 1 6
7 2 5
7 3 4
7 4 3
7 5 2
7 6 1
8 1 7
8 2 6
8 3 5
8 4 4
8 5 3
8 6 2
8 7 1
"""

4. 참고하면 좋은 정답 코드

  • 참조 사이트는 맨 위에 기제.
  • 참조 사이트의 손 코딩도 읽으면 매우 좋으니 참조 할 것.
      def solution(N, number):
          # 허뎝님의 수정 피드백 -> 테스트 케이스가 바뀌면서 예외 사항을 추가해야 함.
          if N == number:
              return 1
                
          # 1. [ SET x 8 ] 초기화
          s = [ set() for x in range(8) ] 
          # 2. 각 set마다 기본 수 "N" * i 수 초기화
          for i,x in enumerate(s, start=1):
              x.add( int( str(N) * i ) )
          # 3. n 일반화
          #   { 
          #       "n" * i U 
          #       1번 set 사칙연산 n-1번 set U
          #       2번 set 사칙연산 n-2번 set U
          #       ...
          #       n-1번 set 사칙연산 1번 set, 
          #    } 
          # number를 가장 최소로 만드는 수 구함.
          for i in range(1, 8):
              for j in range(i):
                  for op1 in s[j]:
                      for op2 in s[i-j-1]:
                          s[i].add(op1 + op2)
                          s[i].add(op1 - op2)
                          s[i].add(op1 * op2)
                          if op2 != 0:
                              s[i].add(op1 // op2)
              if  number in s[i]:
                  answer = i + 1
                  break
          else:
              answer = -1
          return answer
    

【Algorithm】[leetcode] linked-list - swap-nodes-in-pairs

문제 : https://leetcode.com/problems/swap-nodes-in-pairs/

이해 이미지

  • PS - 리스트를 전체로 바라보지 말아라. 결국 하나하나의 객체일 뿐이다.
  • 항상 1. 자리 바꾸기 2. 연결 바꾸기
  • note원본 P1

나의 코드

# https://leetcode.com/problems/swap-nodes-in-pairs/


class ListNode(object):
    def __init__(self, val=0, next=None):
        self.val = val
        self.next = next

head = ListNode(1)
head.next = ListNode(2)
head.next.next = ListNode(3)
head.next.next.next = ListNode(4)

print(head.val, head.next.val, head.next.next.val, head.next.next.next.val, head.next.next.next.next)


def swapPairs(head):
    """
    :type head: ListNode
    :rtype: ListNode
    """
    if not head or not head.next :
        return head
    
    first, second, third = head, head.next, head.next.next
    head = second
    head.next = first
    print(head.val, head.next.val)
    third = swapPairs(third)
    first.next = third
    return head

head = swapPairs(head)
print(head.val, head.next.val, head.next.next.val, head.next.next.next.val, head.next.next.next.next)

최적회 상대 코드

def swapPairs(self, head):

    if not head or not head.next:
        return head
  
    first,second = head, head.next
    
    # 자리 바꾸기 먼저
    third = second.next # 1
    head = second       # 2

    # next 연결 바꿔주기
    second.next = first # 3
    first.next = self.swapPairs(third) # 4
    
    return head

【GPU_Server】 Google Cloud 플랫폼 - VScode SSH, SSH 란?

VScode를 SSH를 사용하여 remote연결하기

VScode를 SSH를 사용하여 remote연결하기

PS

onedrive의 파일 wget으로 가져오기
stackoverflow 답변 링크

파일에 오른쪽 클릭하면 '임베드' 찾을 수 있음

<iframe src="https://onedrive.live.com/embed?cid=FBB2D8FB591497AB&resid=FBB2D8FB591497AB%2155221&authkey=AL6ELFsqIIuTp_s" width="98" height="120" frameborder="0" scrolling="no"></iframe>


https://onedrive.live.com/download?cid=FBB2D8FB591497AB&resid=FBB2D8FB591497AB%2155221&authkey=AL6ELFsqIIuTp_s

wget --no-check-certificate "https://onedrive.live.com/download?cid=FBB2D8FB591497AB&resid=FBB2D8FB591497AB%2155221&authkey=AL6ELFsqIIuTp_s"

0. Reference

  1. 참고 동영상 https://www.youtube.com/watch?v=7kum46SFIaY
  2. 참고 이전 포스트 : GCP의 instance에 Putty gen해서 생성한 key를 넣어주고 Putty로 SSH열기
  3. 참고 동영상 인프런 SSH
  4. 1번 reference로 안돼서 이 블로그 글 이용
    이 블로그 글에 대한 내용을 pdf로 저장해 두었다. 저장 공간은 다음과 같으니 나중에 필요하면 사용하기. 다운 링크

  5. 혹시 모르니 나중에 이것도 참조 https://evols-atirev.tistory.com/28

1. 설치

  1. SSH Gen 생성해서 vm instance에 집어넣어주기

    image

  2. VScode에 remote - SHH 설치하기

    image

  3. SSH target 설정하기

    image

  4. SSH + 하기

    image

  5. config 저장 공간 설정

    image

    맨 위에 있는 것을 선택헤서, SSH를 연결할 때마다 config가 삭제되지 않게 막아준다.

  6. Open 끝

    image

    image

2. 장점

  1. 인터넷 속도 개 빠르다. 파이썬 패키지 다운로드 속도 미쳤다.
  2. CPU도 개좋다. 나의 컴퓨터 CPU를 전혀 사용하지 않는다.
  3. 내 컴퓨터 메모리를 전혀 사용하지 않는다. WSL로 접속하면 Vmmeo로 컴퓨터 랩 1G를 잡아먹어서 짜증났는데, GCP를 사용하니 그런 일 없다.
  4. 파일 보기 및 terminal 다루기가 편하다.
  5. Jupyter Notebook보다 더 많은 작업을 쉽게 할 수 있다.
  6. 파일을 그냥 끌어와서 업로드, 다운로드 할 수 있다. 개미쳤다.

3. 단점

  1. 크레딧 다쓰면 진짜 내 돈나간다.
  2. 다운로드 했던 많은 파일들 설정들이, Instacne 문제가 발생하면 한꺼번에 날아간다.

4. 추신

  1. 앞으로 WSL에 들어가서 굳이 작업하지 말자. WSL에서 작업할 이유가 전혀 없다.
  2. WSL을 전체 삭제해도 지금 될 것 같다. 하지만 일단 놔두자. 추가 환경설정 ~/.zshrc 파일이 나중에 도움이 될지도 모른다
  3. zsh 설정한 것은 매우 좋지만, 굳이 더 이상 쓸 필요 없다. 만약 필요하면 다른 우분투 서버 환경을 zsh 설치해서 shell사용하면 된다.

5. SSH 란?

【Algorithm】 [프머] 코딩테스트연습/ 동적계획/ 등굣길

등교길 문제 링크

동적 계획법 문제로 매우 쉬운 문제지만,

문제 잘못 읽어서, 오류 찾느라 시간을 많이 썼다…

puddles 가 당연히 [행][열] 의 index로 주어지는 줄 알았는데, 아니었다.

1. 정답 코드

def solution(m, n, puddles):
    # 동적 메모리 미리 만들기
    path_num = [[0 for i in range(m+1)] for j in range(n+1)]
    path_num[0][0] = 1

    # puddle 계산하기 쉽게
    for temp in puddles:
        temp[0] = temp[0] - 1
        temp[1] = temp[1] - 1

    # 맨 윗라인
    for j in range(1, m):
        if [j, 0] not in puddles:
            path_num[0][j] = path_num[0][j-1]

    for i in range(1, n):
        if [0, i] not in puddles:
            path_num[i][0] = path_num[i-1][0]

    # 나머지 아래 라인들
    for i in range(1, n):
        for k in range(1, m):
            if [k, i] in puddles:  # 순서 조심,  m, n과 물이 잠긴 지역의 좌표를 담은 2차원 배열 puddles
                path_num[i][k] = 0
            else:    
                path_num[i][k] = path_num[i-1][k] + path_num[i][k-1]

    return path_num[n-1][m-1] % 1000000007

2. 참고하면 좋은 코드

  • 나의 코드와 흐름은 똑같다.
    def solution(m, n, puddles):
      # 문제에서는 1부터 시작하므로, 
      # 문제의 값과 일치할 수 있게 가로 m+1, 세로 n+1로 maps을 만들어준다.
      maps = [[0] * (m + 1) for _ in range(n+1)]
        
      # 시작점
      maps[1][1] = 1
      for i in range(1, n + 1):
          for j in range(1, m + 1):
              if i == 1 and j == 1:
                  continue
              if [j,i] in puddles:
                  maps[i][j] = 0
              else:
                  maps[i][j] = (maps[i-1][j] + maps[i][j-1])
      return (maps[-1][-1]) % 1000000007
    

【Keras】Keras기반 Mask-RCNN - Kaggle Necleus 데이터셋

Keras 기반 Mask-RCNN를 이용해 Kaggle Necleus 데이터셋을 학습시키고 추론해보자.

【Keras】Keras기반 Mask-RCNN - Kaggle Necleus 데이터셋

1. python 핵심 정리 모음(새롭게 안 사실)

python 새롭게 안 사실 및 핵심 내용들

  1. lines tab 처리하는 방법
    • ctrl + [
    • ctrl + ]
    • line drag + tab
    • line drag + shift + tab
  2. os package 유용한 함수들
    • os.listdir : 폴더 내부 파일이름들 list로 따옴
    • os.walk : sub directory를 iteration으로 반환 (검색해서 아래 활용 예시 보기)
    • os.path.dirname : 경로 중 이전 dir에 대한 정보까지만 얻기
  3. image_ids = list(set(image_ids) - set(val_indexs))
    • set과 list를 동시에 이용한다. 교집합을 제거하고, 남은 내용들만 list로 반환
  4. 문자열함수 endwith(문자열) : 문자열에 해당 문자가 있으면 True, 없으면 False
  5. skimage.io.imread(“bool 형식의 mask data 파일 이름”).astype(np.bool)
    • mask 데이터 뽑아 오는 하나의 방법
  6. masks = np.stack(mask_list, axis=-1)
    • 한장한장의 mask 데이터를 concatenation하는 방법
    • 공식 dacument
    • 만약 내가 묶고 싶은 list의 원소가 n개 일 때, axis가 명시하는 shape의 index가 n이 된다.
    • 2개의 list(1*3)를 합치고 axis가 -1이라면, 최종 result는 3x2가 된다.

2. Keras기반 Mask-RCNN - Kaggle Necleus 데이터셋 정의하고 학습하기

  • /DLCV/Segmentation/mask_rcnn/Kaggle_Nucleus_Segmentation_Challenge.ipynb 참고하기
  • 전체 흐름도 정리 : 이전 포스트 자료

1. Kaggle API로 데이터 다운로드 및 데이터 탐방

  • 이전에 배웠던 winSCP, 서버의 directory 구조 그대로 보고, 데이터를 주고 받을 수 있는 프로그램, 을 사용해도 좋다. 하지만 여기서는 kaggle API를 이용해서 data받는게 빠르고 편하다.
  • kaggle API 설치 및 데이터 다운로드 사용법 사이트
import os
import sys
import random
import math
import re
import time
import numpy as np
import tensorflow as tf
import matplotlib
import matplotlib.pyplot as plt
import matplotlib.patches as patches
%matplotlib inline 
from mrcnn.config import Config
from mrcnn import utils
from mrcnn import visualize
from mrcnn.visualize import display_images
import mrcnn.model as modellib
from mrcnn.model import log
## Kaggle에서 2018 Data science bowl Nucleus segmentation 데이터를 download 한 뒤 ./nucleus_data 디렉토리에 압축을 품
# stage1_train.zip 파일에 train용 image 데이터와 mask 데이터가 있음. stage1_train_zip 파일을 stage1_train 디렉토리에 압축 해제
# unzip stage1_train.zip -d stage1_train
# stage1_test.zip 파일에 test용 image 데이터와 mask 데이터가 있음. stage1_test_zip 파일을 stage1_test 디렉토리에 압축 해제
# unzip stage1_test.zip -d stage1_test
  • train용 데이터 세트에 들어있는 데이터 구조 확인
import os
from pathlib import Path

HOME_DIR = str(Path.home())

# 학습용, 테스트용 모두의 기준 디렉토리는 ~/DLCV/data/nucleus 임. 
DATASET_DIR = os.path.join(HOME_DIR, "DLCV/data/nucleus")
# print(DATASET_DIR)
# ~/DLCV/data/nucleus 디렉토리 밑에 학습용 디렉토리인 stage1_train이 만들어짐.stage1_train에 학습 이미지, mask 이미지 데이터 존재. 
subset_dir = 'stage1_train'
train_dataset_dir = os.path.join(DATASET_DIR, subset_dir)
# print(train_dataset_dir)
  • train 데이터 세트의 이미지 파일, mask 파일이 어떠한 디렉토리 구조 형태로 저장되어 있는지 확인.
  • /DLCV/data/nucleus/stage1_train/9a71a416f98971aa14f63ef91242654cc9191a1414ce8bbd38066fe94559aa4f$ ls
    >> images masks
  • 아래 코드 주의 os.walk 사용하는 중요한 코드!!
# 이미지 별로 고유한 이미지명을 가지는 이미지 디렉토리를 가지고 이 디렉토리에 하위 디렉토리로 images, masks를 가짐
# images 에는 하나의 이미지가 있으며 masks는 여러개의 mask 이미지 파일을 가지고 있음. 즉 하나의 이미지에 여러개의 mask 파일을 가지고 있는 형태임. 
# next(os.walk(directory))[1]은 sub directory를 iteration으로 반환 next(os.walk(directory))[2]는 해당 디렉토리 밑에 파일들을 iteration으로 반환
# 즉 [1]은 directory를 반환하고
#    [2]는 파일을 반환한다. 
index = 0 
for dir in next(os.walk(train_dataset_dir))[1]:
    print('┌',dir)
    subdirs = os.path.join(train_dataset_dir, dir)
    for subdir in next(os.walk(subdirs))[1]:
        print('└┬─'+subdir)
        sub_subdirs = os.path.join(subdirs, subdir)
        for sub_subdir in next(os.walk(sub_subdirs))[2]:
            print(' └── '+sub_subdir) # sub_subdir 에서는 png를 가져온 것을 확인할 수 있다.
            index += 1
            if index >1000:
                break

image

  • 하나의 dir에는 ‘하나의 이미지(images)’와 ‘그 이미지에 대한 새포핵 하나하나에 대한 mask 흑백이미지들’이 저장되어 있다.

2. Dataset 객체와 Data load 메소드 작성

  • 학습시 사용할 임의의 Validation용 IMAGE를 무엇으로 사용할지 랜덤 설정
def get_valid_image_ids(dataset_dir, valid_size):
    np.random.seed(0)
    dataset_dir = os.path.join(dataset_dir,'stage1_train')
    image_ids = next(os.walk(dataset_dir))[1] # stage1_train 딱 내부의 폴더들에 대한 iteration 가져옴. [1]은 '폴더'를 의미. 
    total_cnt = len(image_ids) # stage1_train 딱 내부의 폴더들의 갯수를 가져옴
    
    valid_cnt = int(total_cnt * valid_size) # 0 < valid_size < 1 을 명심하기
    valid_indexes = np.random.choice(total_cnt, valid_cnt, replace=False)
    
    return total_cnt, list(np.array(image_ids)[valid_indexes])  # stage1_train 내부 이미지 중, valid에 사용할 폴더의 index(몇번째 폴더)만 가져온다. 
total_cnt, val_indexs = get_valid_image_ids(DATASET_DIR, 0.1) 
print(total_cnt, len(val_indexs))
val_indexs[0:5]
670 67

['d7fc0d0a7339211f2433829c6553b762e2b9ef82cfe218d58ecae6643fa8e9c7',
 '6ab24e7e1f6c9fdd371c5edae1bbb20abeeb976811f8ab2375880b4483860f4d',
 '40b00d701695d8ea5d59f95ac39e18004040c96d17fbc1a539317c674eca084b',
 '1ec74a26e772966df764e063f1391109a60d803cff9d15680093641ed691bf72',
 '431b9b0c520a28375b5a0c18d0a5039dd62cbca7c4a0bcc25af3b763d4a81bec']
  • utils.Dataset 객체의 add_class(), add_image()를 이용하여, 개별 이미지를 Dataset 객체로 로딩하는 load_nucleus() 함수 정의하기.
from mrcnn import utils
import skimage
import numpy as np
import cv2
import matplotlib.pyplot as plt
%matplotlib inline

_, val_indexs = get_valid_image_ids(DATASET_DIR, 0.1)

class NucleusDataset(utils.Dataset):
    
    # subset은 train, valid, stage1_test, stage2_test
    def load_nucleus(self, dataset_dir, subset):
        self.add_class(source='nucleus', class_id=1, class_name='nucleus')  
        # 이미 class로 등록되어 있으면, 지금 데이터셋의 class로 새로 넣지 않음
        # 새로운 데이터셋이라는 것을 명칭해주는 것이 source이다. "우리는 nucleus 라는 데이터셋을 추가로 등록할 것이다."를 의미함 
        
        subset_dir = 'stage1_train' if subset in ['train', 'val'] else subset
        dataset_dir = os.path.join(dataset_dir, subset_dir)
        
        if subset=='val':
            image_ids = val_indexs
        else:
            image_ids = next(os.walk(dataset_dir))[1]  # 폴더들 이름을 전체 list로 저장
            if subset=='train':
                image_ids = list(set(image_ids) - set(val_indexs)) # 

        for image_id in image_ids: # image_id라는 폴더 내부에 images_<image_id>.png 라는 이미지가 있다고 전제
            self.add_image('nucleus', image_id=image_id, path=os.path.join(dataset_dir, image_id, 'images/{}.png'.format(image_id)))   
    
    def load_mask(self, image_id):      ## 오버라이딩으로 정의해주지 않으면 오류나는 함수!  image_id는 숫자
        info = self.image_info[image_id]
        mask_dir = os.path.join(os.path.dirname(os.path.dirname(info['path'])), 'masks')
        mask_list=[]
        for mask_file in next(os.walk(mask_dir))[2]: # mask_dir에 있는 "파일" 이름들을 list로 가지고 있음.
            if mask_file.endswith('.png'):
                mask = skimage.io.imread(os.path.join(mask_dir, mask_file)).astype(np.bool)
                mask_list.append(mask)

                # test_mask = cv2.imread(os.path.join(mask_dir, mask_file))
                # print(type(test_mask), test_mask.shape) -> 하나의 파일은 <class 'numpy.ndarray'> (256, 320, 3)
                
        masks = np.stack(mask_list, axis=-1) 
        
        return masks, np.ones([masks.shape[-1]], dtype=np.int32)
nucleus_dataset = NucleusDataset(utils.Dataset)
nucleus_dataset.load_nucleus(DATASET_DIR, 'train')
#print('class info:', nucleus_dataset.class_info)
#print('image info:', nucleus_dataset.image_info)
nucleus_dataset.prepare()
print('class id:', nucleus_dataset.class_ids)
print('image id:', nucleus_dataset._image_ids)
class id: [0 1]
image id: [  0   1   2   3   4   5   6   7   8   9  10  11  12  13  14  15  16  17
  18  19  20  21  22  23  24  25  26  27  28  29  30  31  32  33  34  35
  36  37  38  39  40  41  42  43  44  45  46  47  48  49  50  51  52  53
  54  55  56  57  58  59  60  ...  586 587 588 589 590 591 592 593
 594 595 596 597 598 599 600 601 602]
nucleus_dataset.image_info[0]

{
‘id’: ‘9f073db4acd7e634fd578af50d4e77218742f63a4d423a99808d6fd7cb0d3cdb’,
‘source’: ‘nucleus’,
‘path’: ‘/home/sb020518/DLCV/data/nucleus/stage1_train/9f073db4acd7e634fd578af50d4e77218742f63a4d423a99808d6fd7cb0d3cdb/images9f073db4acd7e634fd578af50d4e77218742f63a4d423a99808d6fd7cb0d3cdb.png’
}

masks, class_ids = nucleus_dataset.load_mask(0)
masks.shape, class_ids.shape
((256, 256, 18), (18,))
masks, class_ids = nucleus_dataset.load_mask(0)

sample_img = skimage.io.imread("/home/sb020518/DLCV/data/nucleus/stage1_train/9f073db4acd7e634fd578af50d4e77218742f63a4d423a99808d6fd7cb0d3cdb/images/9f073db4acd7e634fd578af50d4e77218742f63a4d423a99808d6fd7cb0d3cdb.png")
print(type(sample_img), sample_img.shape)
plt.imshow(sample_img)
plt.show()

print(masks[0]) 
<class 'numpy.ndarray'> (256, 256, 4)

[[False False False ... False False False]
 [False False False ... False False False]
 [False False False ... False False False]
 ...
 [False False False ... False False False]
 [False False False ... False False False]
 [False False False ... False False False]]

drawing

img_from_cv = cv2.imread("/home/sb020518/DLCV/data/nucleus/stage1_train/9f073db4acd7e634fd578af50d4e77218742f63a4d423a99808d6fd7cb0d3cdb/images/9f073db4acd7e634fd578af50d4e77218742f63a4d423a99808d6fd7cb0d3cdb.png")
print(type(img_from_cv), img_from_cv.shape)
plt.imshow(img_from_cv)
plt.show()

<class 'numpy.ndarray'> (256, 256, 3)

drawing

np.random.seed(0)
image_ids = np.random.choice(nucleus_dataset.image_ids, 4) # 506개의 이미지 중에 4개를 선택한다. 
print(image_ids)
for image_id in image_ids:
    image = nucleus_dataset.load_image(image_id)
    mask, class_ids = nucleus_dataset.load_mask(image_id)
    print('mask shape:', mask.shape, 'class_ids shape:', class_ids.shape)
    visualize.display_top_masks(image, mask, class_ids, nucleus_dataset.class_names, limit=1)
[559 192 359   9]
mask shape: (256, 256, 6) class_ids shape: (6,)
mask shape: (360, 360, 24) class_ids shape: (24,)
mask shape: (256, 256, 16) class_ids shape: (16,)
mask shape: (256, 256, 4) class_ids shape: (4,)

drawing

3. nucleus 데이터 세트 정의 및 pretrain 가져오기

  • Matterport 패키지에서 사용될 수 있도록 학습/검증/테스트 데이터 세트에 대한 각각의 객체 생성 필요!
  • 학습 또는 Inference를 위한 Config 설정
  • 학습과정 정리
dataset_train = NucleusDataset()
dataset_train.load_nucleus(DATASET_DIR, 'train')  # 위에서 NucleusDataset의 맴버 함수로 설정했었음
# dataset을 load한 뒤에는 반드시 prepare()메소드를 호출
dataset_train.prepare()

# Validation dataset
dataset_val = NucleusDataset()
dataset_val.load_nucleus(DATASET_DIR, "val")
dataset_val.prepare()
len(dataset_train.image_info), len(dataset_val.image_info)
# (603, 67)
  • Nucleus 학습을 위한 새로운 Config 객체 생성
from mrcnn.config import Config

train_image_cnt = len(dataset_train.image_info)
val_image_cnt = len(dataset_val.image_info)
print('train_image_cnt:',train_image_cnt, 'validation image count:',val_image_cnt)

class NucleusConfig(Config):
    """Configuration for training on the nucleus segmentation dataset."""
    # Give the configuration a recognizable name
    NAME = "nucleus"

    # Adjust depending on your GPU memory
    IMAGES_PER_GPU = 1

    # Number of classes (including background)
    NUM_CLASSES = 1 + 1  # Background + nucleus

    # Number of training and validation steps per epoch
    STEPS_PER_EPOCH = (train_image_cnt) // IMAGES_PER_GPU
    VALIDATION_STEPS = max(1, (val_image_cnt // IMAGES_PER_GPU))

    # Don't exclude based on confidence. Since we have two classes
    # then 0.5 is the minimum anyway as it picks between nucleus and BG
    DETECTION_MIN_CONFIDENCE = 0

    # Backbone network architecture
    # Supported values are: resnet50, resnet101
    BACKBONE = "resnet50"

    # Input image resizing
    # Random crops of size 512x512
    IMAGE_RESIZE_MODE = "crop"
    IMAGE_MIN_DIM = 512
    IMAGE_MAX_DIM = 512
    IMAGE_MIN_SCALE = 2.0

    # Length of square anchor side in pixels
    RPN_ANCHOR_SCALES = (8, 16, 32, 64, 128)

    # ROIs kept after non-maximum supression (training and inference)
    POST_NMS_ROIS_TRAINING = 1000
    POST_NMS_ROIS_INFERENCE = 2000

    # Non-max suppression threshold to filter RPN proposals.
    # You can increase this during training to generate more propsals.
    RPN_NMS_THRESHOLD = 0.9

    # How many anchors per image to use for RPN training
    RPN_TRAIN_ANCHORS_PER_IMAGE = 64

    # Image mean (RGB)
    MEAN_PIXEL = np.array([43.53, 39.56, 48.22])

    # If enabled, resizes instance masks to a smaller size to reduce
    # memory load. Recommended when using high-resolution images.
    USE_MINI_MASK = True
    MINI_MASK_SHAPE = (56, 56)  # (height, width) of the mini-mask

    # Number of ROIs per image to feed to classifier/mask heads
    # The Mask RCNN paper uses 512 but often the RPN doesn't generate
    # enough positive proposals to fill this and keep a positive:negative
    # ratio of 1:3. You can increase the number of proposals by adjusting
    # the RPN NMS threshold.
    TRAIN_ROIS_PER_IMAGE = 128

    # Maximum number of ground truth instances to use in one image
    MAX_GT_INSTANCES = 200

    # Max number of final detections per image
    DETECTION_MAX_INSTANCES = 400
train_image_cnt: 603 validation image count: 67
  • coco pretrained된 가중치 모델 가져오기.
  • 과거에 아래와 같은 코드로 패키지에 있는 pretrained된 가중치를 가져왔다
      COCO_MODEL_URL = "https://github.com/matterport/Mask_RCNN/releases/download/v2.0/mask_rcnn_coco.h5"
      with urllib.request.urlopen(COCO_MODEL_URL) as resp, open(coco_model_path, 'wb') as out:
          shutil.copyfileobj(resp, out)
    
ROOT_DIR = os.path.abspath("./")
# Path to trained weights file
COCO_WEIGHTS_PATH = os.path.join(ROOT_DIR, "./pretrained/mask_rcnn_coco.h5")

# Directory to save logs and model checkpoints, if not provided
# through the command line argument --logs
MODEL_DIR = os.path.join(ROOT_DIR, "./snapshots/nucleus")

4.학습을 위한 model 객체 생성 및 model.train()

  • Mask_RCNN 패키지는 modellib에 MaskRCNN 객체를 이용하여 Mask RCNN 모델을 생성함.
  • 그렇게 생성한 모델을 이용해서, model.train() model.detect() 를 사용하면 된다.

  • 필수 주의 사항 및 생성 인자
    • mode: training인지 inference인지 설정
    • config: training 또는 inference에 따라 다른 config 객체 사용. Config객체를 상속 받아 각 경우에 새로운 객체를 만들고 이를 이용. inference 시에는 Image를 하나씩 입력 받아야 하므로 Batch size를 1로 만들 수 있도록 설정
    • model_dir: 학습 진행 중에 Weight 모델이 저장되는 장소 지정.
from mrcnn import model as modellib

train_config = NucleusConfig()
# train_config.display()

model = modellib.MaskRCNN(mode="training", config=train_config,
                                  model_dir=MODEL_DIR)

# Exclude the last layers because they require a matching
# number of classes
model.load_weights(COCO_WEIGHTS_PATH, by_name=True, exclude=["mrcnn_class_logits", "mrcnn_bbox_fc","mrcnn_bbox", "mrcnn_mask"])
  • 학습 데이터 세트와 검증 데이터 세트를 NucleusDataset 객체에 로드하고 train 시작
    • augmentation은 imgaug를 사용.
from imgaug import augmenters as iaa

img_aug = iaa.SomeOf((0, 2), [
        iaa.Fliplr(0.5),
        iaa.Flipud(0.5),
        iaa.OneOf([iaa.Affine(rotate=90),
                   iaa.Affine(rotate=180),
                   iaa.Affine(rotate=270)]),
        iaa.Multiply((0.8, 1.5)),
        iaa.GaussianBlur(sigma=(0.0, 5.0))
    ])
  • warning ignore를 안해도 학습은 되지만, imgagu와 충돌하는동안 계속 warning이 발생해서 ignore처리를 하였다. 이런 방법도 있구나 알아두자.
import warnings 
warnings.filterwarnings('ignore')

print("Train all layers")
model.train(dataset_train, dataset_val,
            learning_rate=train_config.LEARNING_RATE,
            epochs=40, augmentation=img_aug,
            layers='all')
Train all layers

Starting at epoch 0. LR=0.001

Checkpoint Path: /home/sb020518/DLCV/Segmentation/mask_rcnn/./snapshots/nucleus/nucleus20200928T1014/mask_rcnn_nucleus_{epoch:04d}.h5
Selecting layers to train
conv1                  (Conv2D)
bn_conv1               (BatchNorm)
res2a_branch2a         (Conv2D)
bn2a_branch2a          (BatchNorm)
res2a_branch2b         (Conv2D)
bn2a_branch2b          (BatchNorm)
res2a_branch2c         (Conv2D)
res2a_branch1          (Conv2D)
bn2a_branch2c          (BatchNorm)
bn2a_branch1           (BatchNorm)
res2b_branch2a         (Conv2D)
bn2b_branch2a          (BatchNorm)
res2b_branch2b         (Conv2D)
bn2b_branch2b          (BatchNorm)
res2b_branch2c         (Conv2D)
bn2b_branch2c          (BatchNorm)
res2c_branch2a         (Conv2D)
bn2c_branch2a          (BatchNorm)
res2c_branch2b         (Conv2D)
bn2c_branch2b          (BatchNorm)
res2c_branch2c         (Conv2D)
bn2c_branch2c          (BatchNorm)
res3a_branch2a         (Conv2D)
bn3a_branch2a          (BatchNorm)
res3a_branch2b         (Conv2D)
bn3a_branch2b          (BatchNorm)
res3a_branch2c         (Conv2D)
res3a_branch1          (Conv2D)
bn3a_branch2c          (BatchNorm)
bn3a_branch1           (BatchNorm)
res3b_branch2a         (Conv2D)
bn3b_branch2a          (BatchNorm)
res3b_branch2b         (Conv2D)
bn3b_branch2b          (BatchNorm)
res3b_branch2c         (Conv2D)
bn3b_branch2c          (BatchNorm)
res3c_branch2a         (Conv2D)
bn3c_branch2a          (BatchNorm)
res3c_branch2b         (Conv2D)
bn3c_branch2b          (BatchNorm)
res3c_branch2c         (Conv2D)
bn3c_branch2c          (BatchNorm)
res3d_branch2a         (Conv2D)
bn3d_branch2a          (BatchNorm)
res3d_branch2b         (Conv2D)
bn3d_branch2b          (BatchNorm)
res3d_branch2c         (Conv2D)
bn3d_branch2c          (BatchNorm)
res4a_branch2a         (Conv2D)
bn4a_branch2a          (BatchNorm)
res4a_branch2b         (Conv2D)
bn4a_branch2b          (BatchNorm)
res4a_branch2c         (Conv2D)
res4a_branch1          (Conv2D)
bn4a_branch2c          (BatchNorm)
bn4a_branch1           (BatchNorm)
res4b_branch2a         (Conv2D)
bn4b_branch2a          (BatchNorm)
res4b_branch2b         (Conv2D)
bn4b_branch2b          (BatchNorm)
res4b_branch2c         (Conv2D)
bn4b_branch2c          (BatchNorm)
res4c_branch2a         (Conv2D)
bn4c_branch2a          (BatchNorm)
res4c_branch2b         (Conv2D)
bn4c_branch2b          (BatchNorm)
res4c_branch2c         (Conv2D)
bn4c_branch2c          (BatchNorm)
res4d_branch2a         (Conv2D)
bn4d_branch2a          (BatchNorm)
res4d_branch2b         (Conv2D)
bn4d_branch2b          (BatchNorm)
res4d_branch2c         (Conv2D)
bn4d_branch2c          (BatchNorm)
res4e_branch2a         (Conv2D)
bn4e_branch2a          (BatchNorm)
res4e_branch2b         (Conv2D)
bn4e_branch2b          (BatchNorm)
res4e_branch2c         (Conv2D)
bn4e_branch2c          (BatchNorm)
res4f_branch2a         (Conv2D)
bn4f_branch2a          (BatchNorm)
res4f_branch2b         (Conv2D)
bn4f_branch2b          (BatchNorm)
res4f_branch2c         (Conv2D)
bn4f_branch2c          (BatchNorm)
res5a_branch2a         (Conv2D)
bn5a_branch2a          (BatchNorm)
res5a_branch2b         (Conv2D)
bn5a_branch2b          (BatchNorm)
res5a_branch2c         (Conv2D)
res5a_branch1          (Conv2D)
bn5a_branch2c          (BatchNorm)
bn5a_branch1           (BatchNorm)
res5b_branch2a         (Conv2D)
bn5b_branch2a          (BatchNorm)
res5b_branch2b         (Conv2D)
bn5b_branch2b          (BatchNorm)
res5b_branch2c         (Conv2D)
bn5b_branch2c          (BatchNorm)
res5c_branch2a         (Conv2D)
bn5c_branch2a          (BatchNorm)
res5c_branch2b         (Conv2D)
bn5c_branch2b          (BatchNorm)
res5c_branch2c         (Conv2D)
bn5c_branch2c          (BatchNorm)
fpn_c5p5               (Conv2D)
fpn_c4p4               (Conv2D)
fpn_c3p3               (Conv2D)
fpn_c2p2               (Conv2D)
fpn_p5                 (Conv2D)
fpn_p2                 (Conv2D)
fpn_p3                 (Conv2D)
fpn_p4                 (Conv2D)
In model:  rpn_model
    rpn_conv_shared        (Conv2D)
    rpn_class_raw          (Conv2D)
    rpn_bbox_pred          (Conv2D)
mrcnn_mask_conv1       (TimeDistributed)
mrcnn_mask_bn1         (TimeDistributed)
mrcnn_mask_conv2       (TimeDistributed)
mrcnn_mask_bn2         (TimeDistributed)
mrcnn_class_conv1      (TimeDistributed)
mrcnn_class_bn1        (TimeDistributed)
mrcnn_mask_conv3       (TimeDistributed)
mrcnn_mask_bn3         (TimeDistributed)
mrcnn_class_conv2      (TimeDistributed)
mrcnn_class_bn2        (TimeDistributed)
mrcnn_mask_conv4       (TimeDistributed)
mrcnn_mask_bn4         (TimeDistributed)
mrcnn_bbox_fc          (TimeDistributed)
mrcnn_mask_deconv      (TimeDistributed)
mrcnn_class_logits     (TimeDistributed)
mrcnn_mask             (TimeDistributed)
WARNING:tensorflow:From /home/sb020518/anaconda3/envs/tf113/lib/python3.6/site-packages/tensorflow/python/ops/math_ops.py:3066: to_int32 (from tensorflow.python.ops.math_ops) is deprecated and will be removed in a future version.
Instructions for updating:
Use tf.cast instead.
Epoch 1/40
  1/603 [..............................] - ETA: 36:40:48 - loss: 5.2075 - rpn_class_loss: 1.6814 - rpn_bbox_loss: 1.6133 - mrcnn_class_loss: 1.9128 - mrcnn_bbox_loss: 0.0000e

---------------------------------------------------------------------------

5. 위에서 학습 시킨 모델로 Inference 수행

  • 예측용 모델을 로드. mode는 inference로 설정,config는 NucleusInferenceConfig()로 설정,
  • 예측용 모델에 위에서 찾은 학습 중 마지막 저장된 weight파일을 로딩함.
  • weight가져온_model.detect() 를 사용하면 쉽게 Inferece 결과를 추출할 수 있다.
class NucleusInferenceConfig(NucleusConfig):
    NAME='nucleus'   # 위의 train config와 같은 name을 가지도록 해야한다.
    # 이미지 한개씩 차례로 inference하므로 batch size를 1로 해야 하며 이를 위해 IMAGES_PER_GPU = 1
    GPU_COUNT = 1
    IMAGES_PER_GPU = 1
    # pad64는 64 scale로 이미지를 맞춰서 resize수행. 
    IMAGE_RESIZE_MODE = "pad64"
    # Non-max suppression threshold to filter RPN proposals.
    # You can increase this during training to generate more propsals.
    RPN_NMS_THRESHOLD = 0.7

infer_config = NucleusInferenceConfig()
inference_model = modellib.MaskRCNN(mode="inference", config=infer_config, model_dir=MODEL_DIR)
weights_path = model.find_last()  # model weight path를 직접 정해줘도 되지만, 이와 같은 방법으로, 가장 낮은 loss의 weight path를 찾아준다.
print('학습중 마지막으로 저장된 weight 파일:', weights_path)
inference_model.load_weights(weights_path, by_name=True)

- 테스트용 데이터 세트를 NucleusDataset으로 로딩. load_nucleus() 테스트 세트를 지정하는 'stage1_test' 입력. 
dataset_test = NucleusDataset()
dataset_test.load_nucleus(DATASET_DIR, 'stage1_test') # 위에서 load_nucleus 직접 정의했던거 잊지 말기
dataset_test.prepare()
dataset_test.image_ids
"""
    array([ 0,  1,  2,  3,  4,  5,  6,  7,  8,  9, 10, 11, 12, 13, 14, 15, 16,
           17, 18, 19, 20, 21, 22, 23, 24, 25, 26, 27, 28, 29, 30, 31, 32, 33,
           34, 35, 36, 37, 38, 39, 40, 41, 42, 43, 44, 45, 46, 47, 48, 49, 50,
           51, 52, 53, 54, 55, 56, 57, 58, 59, 60, 61, 62, 63, 64])
"""
  • 우선 test 셋에 있는 데이터를 model에 통과시켜서, 모든 test data 64개에 대해서, Segmentation결과를 추출하고 visualize 해보자.
for image_id in dataset_test.image_ids:
        # Load image and run detection
        image = dataset_test.load_image(image_id)
        print(len(image))
        # Detect objects
        r = inference_model.detect([image], verbose=0)[0]
        # Save image with masks
        visualize.display_instances(
            image, r['rois'], r['masks'], r['class_ids'],
            dataset_test.class_names, r['scores'],
            show_bbox=False, show_mask=False,
            title="Predictions")

for image_id in dataset_test.image_ids:
        # Load image and run detection
        image = dataset_test.load_image(image_id)
        print(len(image))
       
        #plt.savefig("{}/{}.png".format(submit_dir, dataset.image_info[image_id]["id"]))

6. 위 5의 한장의 사진을 inference하는 능력을 가지고 전체사진 inference 수행 하는 함수 만들기

def detect(model, dataset_dir, subset):
    """Run detection on images in the given directory."""
    print("Running on {}".format(dataset_dir))

    # Create directory
    if not os.path.exists(RESULTS_DIR):
        os.makedirs(RESULTS_DIR)
    submit_dir = "submit_{:%Y%m%dT%H%M%S}".format(datetime.datetime.now())
    submit_dir = os.path.join(RESULTS_DIR, submit_dir)
    os.makedirs(submit_dir)

    # Read dataset
    dataset = NucleusDataset()
    dataset.load_nucleus(dataset_dir, subset)
    dataset.prepare()
    # Load over images
    submission = []
    for image_id in dataset.image_ids:
        # Load image and run detection
        image = dataset.load_image(image_id)
        # Detect objects
        r = model.detect([image], verbose=0)[0]
        # Encode image to RLE. Returns a string of multiple lines
        source_id = dataset.image_info[image_id]["id"]
        rle = mask_to_rle(source_id, r["masks"], r["scores"])
        submission.append(rle)
        # Save image with masks
        visualize.display_instances(
            image, r['rois'], r['masks'], r['class_ids'],
            dataset.class_names, r['scores'],
            show_bbox=False, show_mask=False,
            title="Predictions")
        plt.savefig("{}/{}.png".format(submit_dir, dataset.image_info[image_id]["id"]))

    # Save to csv file
    submission = "ImageId,EncodedPixels\n" + "\n".join(submission)
    file_path = os.path.join(submit_dir, "submit.csv")
    with open(file_path, "w") as f:
        f.write(submission)
    print("Saved to ", submit_dir)
detect(model, args.dataset, args.subset)

【Keras】Keras기반 Mask-RCNN - Balloon 데이터셋, Python 추가 공부

Keras 기반 Mask-RCNN를 이용해 Balloon 데이터셋을 학습시키고 추론해보자.

Keras기반 Mask-RCNN - Balloon 데이터셋

1. 앞으로의 과정 핵심 요약

drawing

  1. /Mask_RCNN/tree/master/samples/balloon 에 있는 내용들을 활용하자.

  2. Matterport Mask RCNN Train 프로세스 및 앞으로의 과정 핵심 정리

    drawing

    drawing

2. 스스로 공부해보기

  • 강의를 보니, 큰 그림은 잡아주신다. 하지만 진짜 공부는 내가 해야한다. 코드를 하나하나 파는 시간을 가져보자. 데이터 전처리 작업으로써 언제 어디서 나중에 다시 사용할 능력일지 모르니, 직접 공부하는게 낫겠다.
    • 코드 보는 순서 기록
      1. /mask_rcnn/Balloon_데이터세트_학습및_Segmentation.ipynb
      2. /sample/balloon/balloon.py
      3. /mrcnn/utils.py

3. Python 새로운 핵심 정리

python 새롭게 안 사실 및 핵심 내용들

  1. super() : 참고 사이트
    • __init__ 나 다른 맴버 함수를 포함해서, 자식 클래스에서 아무런 def을 하지 않으면 고대로~ 부모 클래스의 내용이 상속된다. 자식 클래스에서도 함수든 변수든 모두 사용 가능하다.
    • 하지만 문제가 언제 발생하냐면, def 하는 순간 발생한다. 만약 def __init__(self, ..): 하는 순간, 오버라이딩이 되어 원래 부모 클래스의 내용은 전부 사라지게 된다. 이럴 떄, 사용하는게 super이다.
    • 대신 클래스 변수를 사용하는 공간에는 super를 사용하지 않아도 상속한 부모 클래스의 내용이 전부 알아서 들어간다.
    • super자리에 코드들이 쫘르르륵 들어간다고 생각하라.(마치 해더파일에 있는 함수의 내용이 링크에 의해서 쫘르르 코드가 옮겨 들어가듯)
    • 아래와 같이, super(MethodFunctionName, self).init(객체 생성자에 들어가야 할 input parameter) 를 사용하면, 이렇게 생성된 부모클래스로 만들어진 객체의 맴버변수, 맴버함수를 그대로 사용할 수 있다.
            super(MaskRCNNPredictor, self).__init__(OrderedDict([
                ("conv5_mask", misc_nn_ops.ConvTranspose2d(in_channels, dim_reduced, 2, 2, 0)),
                ("relu", nn.ReLU(inplace=True)),
                ("mask_fcn_logits", misc_nn_ops.Conv2d(dim_reduced, num_classes, 1, 1, 0)),
            ]))
      
  2. VS code - 새롭게 파일을 열 떄 강제로 새로운 탭으로 나오게하는 방법 : setting -> workbencheditor.enablePreview” -> false 체크
  3. jupyter Notebook font size 바꾸기 : setting -> Editor:Font Size Controls the font size in pixels. -> 원하는size대입
  4. 함수안에 함수를 정의하는 행동은 왜 하는 것일까?
    그것은 아래와 같은 상황에 사용한다. 함수안의 함수(fun2)는 fun1의 변수를 전역변수처럼 이용할 수 있다. 다시 말해 fun2는 a와 b를 매개변수로 받지 않았지만, 함수 안에서 a와 b를 사용하는 것을 확인할 수 있다.
     def fun1(self, a,b):
         a = 1
         b = 2
         def fun2(c):
             return a + b + c
         k = fun2(3)
         return k
    
  5. numpy array에 대한 고찰
     import numpy as np
     a = np.ones((10, 10, 3))
     print(np.sum(a, axis=-1).shape)             
     # (10,10) 그냥 2차원 배열이다.
     print(np.sum(a, -1, keepdims=True).shape)   
     np.sum(a, -1, keepdims=True)[:,:,0] 
     # (10,10,1) 3차원 배열의 가장 첫번쨰 원소에 2차원 배열이 들어가 있고, 그 2차원 배열 shape가 10*10 이다.
    

    여기서 주요 요점!

    • n차원의 k번째 원소에는(하나의 원소는) n-1차원의배열이다.
    • 3차원의 1번쨰 원소에는 2차원 배열이다.
    • 2차원의 1번째 원소에는 1차원 배열이다.
    • 1차원의 1번째 원소에는 0차원 배열(스칼라)이다.
  6. numpy indexing (인덱싱) 언젠간 공부해야한다.
  7. cv2.circle : 이미지에 점 찍기
  8. skimage.draw.polygon : polygon 정보로 내부 채우기
  9. pretrained weights를 load 할 때, class의 갯수가 다르면head 부분의 layer는 exclude하여 가져오기.

4. 전체 코드 공부해보기

1. Balloon data data 준비

  • /DLCV/Segmentation/mask_rcnn/Balloon_데이터세트_학습및_Segmentation.ipynb 파일 참조
  • Matterport 패키지를 이용하여 Balloon 데이터 세트를 학습하고 이를 기반으로 Segmentation 적용
    1. realse에 자료 다운 받기. balloon_dataset.zip 파일

drawing

  1. ~/DLCV/data 에 wget해서 바로 unzip
  2. train, val 폴더가 있고, 그 안에 많은 이미지와 json파일 하나 있다.
import os
import sys
import itertools
import math
import logging
import json
import re
import random
from collections import OrderedDict

import numpy as np
import matplotlib
import matplotlib.pyplot as plt
import matplotlib.patches as patches
import matplotlib.lines as lines
from matplotlib.patches import Polygon
import cv2

%matplotlib inline
from mrcnn import utils
from mrcnn import visualize
from mrcnn.visualize import display_images
import mrcnn.model as modellib
from mrcnn.model import log
  • 아래과정 설명
    • /Mask_RCNN/tree/master/samples/balloon를 그냥 패키지로 append해버리자.
    • 그리고 그 안에 ballon.py를 쉽게 사용할 수 있다.
    • /Mask_RCNN/blob/master/samples/balloon/balloon.py파일을 하나하나 뜯어가며 공부해도 좋다. 그대로 사용하는 것보다 공부를 하자!!
    • 코드를 보면, 아래처럼 구현되어 있는 것을 확인할 수 있다. 우리도 이렇게 해야한다.
        # utils.Dataset을 상속해서 오버로딩을 해야한다. 
        class BalloonDataset(utils.Dataset):
            def load_mask(self, image_id):
      
#Mask_RCNN 패키지의 samples/balloon 디렉토리의 balloon.py 를 import 한다. 
ROOT_DIR = os.path.abspath(".")
sys.path.append(os.path.join(ROOT_DIR, "Mask_RCNN/samples/balloon/"))

import balloon
  • balloon 데이터 세트가 제대로 되어 있는지 확인. train과 val 서브 디렉토리가 ~/DLCV/data/balloonn 에 존재해야 함.
import subprocess
from pathlib import Path

HOME_DIR = str(Path.home())
BALLOON_DATA_DIR = os.path.join(HOME_DIR, "DLCV/data/balloon")
  • balloon 모듈에 설정된 Config 셋업. GPU 갯수, Batch시 image갯수가 사전 설정 되어 있음.
  • BalloonConfig도 mrcnn.config를 상속해서 사용하는 것을 알 수 있다.
config = balloon.BalloonConfig()
config.IMAGES_PER_GPU = 1
config.display()
Configurations:
BACKBONE                       resnet101
BACKBONE_STRIDES               [4, 8, 16, 32, 64]
BATCH_SIZE                     2
BBOX_STD_DEV                   [0.1 0.1 0.2 0.2]
COMPUTE_BACKBONE_SHAPE         None
...
USE_MINI_MASK                  True
USE_RPN_ROIS                   True
VALIDATION_STEPS               50
WEIGHT_DECAY                   0.0001
  • balloon 모듈에서 balloon 데이터 세트 로딩.
# Dataset 로딩한다. . 

dataset = balloon.BalloonDataset()
dataset.load_balloon(BALLOON_DATA_DIR, "train")

# Must call before using the dataset
dataset.prepare()

print("Image Count: {}".format(len(dataset.image_ids)))
print("Class Count: {}".format(dataset.num_classes))
for i, info in enumerate(dataset.class_info):
    print("{:3}. {:50}".format(i, info['name']))
Image Count: 61
Class Count: 2
  0. BG                                                
  1. balloon                                           
  • balloon 모듈에서 로딩한 balloon 데이터 세트의 세부 정보 확인.
# dataset의 image_info는 리스트 객체이며 내부 원소로 이미지별 세부 정보를 딕셔너리로 가지고 있음. 
# dataset의 image_ids 는 이미지의 고유 id나 이름이 아니라 dataset에서 이미지의 상세 정보를 관리하기 위한 리스트 인덱스에 불과 

print('#### balloon 데이터 세트 이미지의 인덱스 ID들 ####')
print(dataset.image_ids)
# print('\n ##### balloon 데이터 세트의 이미지 정보들 ####')
# print(dataset.image_info)
#### balloon 데이터 세트 이미지의 인덱스 ID들 ####
[ 0  1  2  3  4  5  6  7  8  9 10 11 12 13 14 15 16 17 18 19 20 21 22 23
 24 25 26 27 28 29 30 31 32 33 34 35 36 37 38 39 40 41 42 43 44 45 46 47
 48 49 50 51 52 53 54 55 56 57 58 59 60]

2. 가져온 데이터 Load & Read 해보기

  • balloon.py 파일의 BalloonDataset.Load_mask 함수를 보면, polygon정보를 True-False mask 정보로 바꾸는 것을 확인할 수 있다.
image_28 = dataset.image_info[28]  # 28 index 이미지의 정보를 가져온다
print(image_28,'\n')
polygons = image_28['polygons']
polygon_x = polygons[0]['all_points_x']
polygon_y = polygons[0]['all_points_y']
print(len(polygon_x))
# print('polygon_x:', polygon_x, 'polygon_y:',polygon_y)

polygon_xy = [(x, y) for (x, y) in zip(polygon_x, polygon_y)]
print('polygon_xy:', polygon_xy)
{'id': '5178670692_63a4365c9c_b.jpg', 'source': 'balloon', 'path': '/home/sb020518/DLCV/data/balloon/train/5178670692_63a4365c9c_b.jpg', 'width': 683, 'height': 1024, 'polygons': [{'name': 'polygon', 'all_points_x': [371, 389, 399, 409, 416, 415, 407, 395, 381, 364, 346, 331, 327, 324, 322, 318, 316, 319, 304, 290, 276, 280, 289, 304, 326, 351, 371], 'all_points_y': [424, 432, 443, 459, 482, 505, 526, 544, 558, 567, 573, 576, 576, 580, 580, 577, 574, 572, 562, 543, 509, 477, 451, 436, 423, 420, 424]}]} 

27
polygon_xy: [(371, 424), (389, 432), (399, 443), (409, 459), (416, 482), (415, 505), (407, 526), (395, 544), (381, 558), (364, 567), (346, 573), (331, 576), (327, 576), (324, 580), (322, 580), (318, 577), (316, 574), (319, 572), (304, 562), (290, 543), (276, 509), (280, 477), (289, 451), (304, 436), (326, 423), (351, 420), (371, 424)]
image_28_array = cv2.imread(os.path.join(BALLOON_DATA_DIR,'train/'+image_28['id']))
for position in polygon_xy:
    cv2.circle(image_28_array, position, 3, (255, 0, 0), -1) # 이미지에 점을 찍는 함수

# plt.figure(figsize=(8, 8))
# plt.axis('off')    
# plt.imshow(image_28_array)

drawing

np.random.seed(99)
# Load and display random samples
image_ids = np.random.choice(dataset.image_ids, 4)
print('image_ids:', image_ids)
for image_id in image_ids:
    image = dataset.load_image(image_id)
    # 지정된 image_id에 있는 mask 를 로딩하고 시각화를 위한 mask정보들과 대상 클래스 ID들을 추출
    mask, class_ids = dataset.load_mask(image_id)
    #원본 데이터와 여러개의 클래스들에 대해 Mask를 시각화 하되, 가장 top 클래스에 대해서는 클래스명까지 추출. 나머지는 배경
    visualize.display_top_masks(image, mask, class_ids, dataset.class_names)
image_ids: [ 1 35 57 40]

drawing

image = dataset.load_image(28)
print(image.shape)
print(image_28['polygons'])

3. polygon 형태의 데이터를 boolean mask 형태로 변환

  • balloon.py의 dataset.load_mask 함수 내용 참조
  • skimage.draw.polygon이라는 함수 적극적으로 사용
import skimage

img = np.zeros((10, 10), dtype=np.uint8)
r = np.array([1, 2, 8])
c = np.array([1, 7, 4])
plt.imshow(img, cmap='gray')
plt.show()
# r과 c로 지정된 인덱스에 있는 img 값만 1로 설정함. 
rr, cc = skimage.draw.polygon(r, c)
img[rr, cc] = 1
print('row positions:',rr, 'column positions:',cc)
print('Boolean형태로 masking된 img:\n',img.astype(np.bool))
plt.imshow(img, cmap='gray')

drawing

mask, class_ids = dataset.load_mask(59)
print("mask shape:", mask.shape, "class_ids:", class_ids)
# print(mask)
mask shape: (679, 1024, 28) class_ids: [1 1 1 1 1 1 1 1 1 1 1 1 1 1 1 1 1 1 1 1 1 1 1 1 1 1 1 1]
image = dataset.load_image(28)
mask, class_ids = dataset.load_mask(28)
visualize.display_top_masks(image, mask, class_ids, dataset.class_names)

4. ballon 데이터 세트를 다루기 위한 BallonDataset Class 정의

  • 아래의 코드는 ballon.py의 class BalloonDataset(utils.Dataset): 내용과 동일하다. 여기서 보면 load_balloon를 사용해서 우리가 가진 이미지에 대해서 정의한다. 단, json파일은 이미 만들어져 있어야 한다.
  • 그리고 위의 코드에서 dataset.load_balloon(BALLOON_DATA_DIR, “train”); dataset.prepare(); 을 사용했던 것을 확인할 수 있다.
class BalloonDataset(utils.Dataset):

    def load_balloon(self, dataset_dir, subset):
        """Load a subset of the Balloon dataset.
        dataset_dir: Root directory of the dataset.
        subset: Subset to load: train or val
        """
        # 클래스 id와 클래스명 등록은 Dataset의 add_class()를 이용. 
        self.add_class("balloon", 1, "balloon")

        # train또는 val 용도의 Dataset 생성만 가능. 
        assert subset in ["train", "val"]
        dataset_dir = os.path.join(dataset_dir, subset)
        
        # json 형태의 annotation을 로드하고 파싱. 
        annotations = json.load(open(os.path.join(dataset_dir, "via_region_data.json")))
        annotations = list(annotations.values())  # don't need the dict keys
        
        annotations = [a for a in annotations if a['regions']]

        # Add images
        for a in annotations:
            # Get the x, y coordinaets of points of the polygons that make up
            # the outline of each object instance. These are stores in the
            # shape_attributes (see json format above)
            # The if condition is needed to support VIA versions 1.x and 2.x.
            if type(a['regions']) is dict:
                polygons = [r['shape_attributes'] for r in a['regions'].values()]
            else:
                polygons = [r['shape_attributes'] for r in a['regions']] 

            # load_mask() needs the image size to convert polygons to masks.
            # Unfortunately, VIA doesn't include it in JSON, so we must read
            # the image. This is only managable since the dataset is tiny.
            image_path = os.path.join(dataset_dir, a['filename'])
            image = skimage.io.imread(image_path)
            height, width = image.shape[:2]

            self.add_image(
                "balloon",
                image_id=a['filename'],  # use file name as a unique image id
                path=image_path,
                width=width, height=height,
                polygons=polygons)

    def load_mask(self, image_id):
        """Generate instance masks for an image.
       Returns:
        masks: A bool array of shape [height, width, instance count] with
            one mask per instance.
        class_ids: a 1D array of class IDs of the instance masks.
        """
        # If not a balloon dataset image, delegate to parent class.
        image_info = self.image_info[image_id]
        if image_info["source"] != "balloon":
            return super(self.__class__, self).load_mask(image_id)

        # Convert polygons to a bitmap mask of shape
        # [height, width, instance_count]
        info = self.image_info[image_id]
        mask = np.zeros([info["height"], info["width"], len(info["polygons"])],
                        dtype=np.uint8)
        for i, p in enumerate(info["polygons"]):
            # Get indexes of pixels inside the polygon and set them to 1
            rr, cc = skimage.draw.polygon(p['all_points_y'], p['all_points_x'])
            mask[rr, cc, i] = 1

        # Return mask, and array of class IDs of each instance. Since we have
        # one class ID only, we return an array of 1s
        return mask.astype(np.bool), np.ones([mask.shape[-1]], dtype=np.int32)
    
    '''def image_reference(self, image_id):
        """Return the path of the image."""
        info = self.image_info[image_id]
        if info["source"] == "balloon":
            return info["path"]
        else:
            super(self.__class__, self).image_reference(image_id)
    '''

5. balloon 데이터 세트의 학습 수행.

  • 학습과 Validation용 Dataset 설정.
import skimage

# Training dataset.
dataset_train = BalloonDataset()
dataset_train.load_balloon(BALLOON_DATA_DIR, "train")
dataset_train.prepare()

# Validation dataset
dataset_val = BalloonDataset()
dataset_val.load_balloon(BALLOON_DATA_DIR, "val")
dataset_val.prepare()
  • Config 설정 : 이것도 balloon.py에 있는 내용을 거의 그대로!
from mrcnn.config import Config

TRAIN_IMAGE_CNT = len(dataset_train.image_info)
VALID_IMAGE_CNT = len(dataset_val.image_info)

class BalloonConfig(Config):
    """Configuration for training on the toy  dataset.
    Derives from the base Config class and overrides some values.
    """
    # Give the configuration a recognizable name
    NAME = "balloon"

    # Number of classes (including background)
    NUM_CLASSES = 1 + 1  # Background + balloon

    # Skip detections with < 90% confidence
    DETECTION_MIN_CONFIDENCE = 0.9
    
    # We use a GPU with 12GB memory, which can fit two images.
    # Adjust down if you use a smaller GPU.
    IMAGES_PER_GPU = 1
    
    # 추가.
    GPU_COUNT = 1

    # 원본에서 수정.
    #STEPS_PER_EPOCH = TRAIN_IMAGE_CNT  // IMAGES_PER_GPU
    #VALIDATION_STEPS = VALID_IMAGE_CNT  // IMAGES_PER_GPU
    
    # 원본 STEPS_PER_EPOCH
    STEPS_PER_EPOCH = TRAIN_IMAGE_CNT  // IMAGES_PER_GPU
    VALIDATION_STEPS = VALID_IMAGE_CNT  // IMAGES_PER_GPU

    #BACKBONE = 'resnet101'
    
# config 설정. 
train_config = BalloonConfig()
train_config.display()

6. Mask RCNN Training 초기 모델 생성 및 pretrained weight값 로딩

  • 여기서 부터는 (/mrcnn/model.py 내부에)karas의 내용들이 다수 들어가기 때문에 어려울 수 있으니 참고.
import mrcnn.model as modellib
from mrcnn.model import log

balloon_model = modellib.MaskRCNN(mode="training", config=train_config, model_dir='./snapshots')

# COCO 데이터 세트로 pretrained 된 모델을 이용하여 초기 weight값 로딩. 
COCO_MODEL_PATH = os.path.join(ROOT_DIR, "./pretrained/mask_rcnn_coco.h5")
balloon_model.load_weights(COCO_MODEL_PATH, by_name=True, exclude=["mrcnn_class_logits", "mrcnn_bbox_fc","mrcnn_bbox", "mrcnn_mask"])

7. 위에서 가져온 pretrained model을 가지고 학습 수행

'''
데이터 세트가 작고,단 하나의 클래스임. 
pretrained 된 Coco 데이터 세트로 초기 weight 설정되었기에 RPN과 classifier만 학습해도 모델 성능은 큰 영향이 없을 거라 예상
all: All the layers
3+: Train Resnet stage 3 and up
4+: Train Resnet stage 4 and up
5+: Train Resnet stage 5 and up
'''
print("Training network heads")
balloon_model.train(dataset_train, dataset_val,
            learning_rate=train_config.LEARNING_RATE,
            epochs=30,
            layers='heads')
Training network heads

Starting at epoch 0. LR=0.001

Checkpoint Path: ./snapshots/balloon20200923T1430/mask_rcnn_balloon_{epoch:04d}.h5
Selecting layers to train
fpn_c5p5               (Conv2D)
fpn_c4p4               (Conv2D)
fpn_c3p3               (Conv2D)
fpn_c2p2               (Conv2D)
fpn_p5                 (Conv2D)
fpn_p2                 (Conv2D)
fpn_p3                 (Conv2D)
fpn_p4                 (Conv2D)
In model:  rpn_model
    rpn_conv_shared        (Conv2D)
    rpn_class_raw          (Conv2D)
    rpn_bbox_pred          (Conv2D)
mrcnn_mask_conv1       (TimeDistributed)
mrcnn_mask_bn1         (TimeDistributed)
mrcnn_mask_conv2       (TimeDistributed)
mrcnn_mask_bn2         (TimeDistributed)
mrcnn_class_conv1      (TimeDistributed)
mrcnn_class_bn1        (TimeDistributed)
mrcnn_mask_conv3       (TimeDistributed)
mrcnn_mask_bn3         (TimeDistributed)
mrcnn_class_conv2      (TimeDistributed)
mrcnn_class_bn2        (TimeDistributed)
mrcnn_mask_conv4       (TimeDistributed)
mrcnn_mask_bn4         (TimeDistributed)
mrcnn_bbox_fc          (TimeDistributed)
mrcnn_mask_deconv      (TimeDistributed)
mrcnn_class_logits     (TimeDistributed)
mrcnn_mask             (TimeDistributed)

Use tf.cast instead.
Epoch 1/30
Process Process-2:
Process Process-3:
Process Process-5:
Process Process-6:

8. 학습이 완료된 모델을 이용하여 inference 수행.

  • config를 inference용으로 변경
class InferenceConfig(BalloonConfig):
    # NAME은 학습모델과 동일한 명을 부여
    NAME='balloon'
    GPU_COUNT = 1
    IMAGES_PER_GPU = 1
        
infer_config = InferenceConfig()
infer_config.display()
  • 학습된 모델의 weight 파일을 MaskRCNN의 inference 모델로 로딩.
model = modellib.MaskRCNN(mode="inference", model_dir='./snapshots', config=infer_config)
# callback에 의해 model weights 가 파일로 생성되며, 가장 마지막에 생성된 weights 가 가장 적은 loss를 가지는 것으로 가정. 
weights_path = model.find_last()
print('최저 loss를 가지는 model weight path:', weights_path)
# 지정된 weight 파일명으로 모델에 로딩. 
model.load_weights(weights_path, by_name=True)
  • Instance Segmentation을 수행할 파일들을 dataset로 로딩. val 디렉토리에 있는 파일들을 로딩.
# Inference를 위해 val Dataset 재로딩. 
dataset_val = BalloonDataset()
dataset_val.load_balloon(BALLOON_DATA_DIR, "val")
dataset_val.prepare()

print("Images: {}\nClasses: {}".format(len(dataset_val.image_ids), dataset_val.class_names))
- 아래처럼 model.detect을 사용해서 아주 쉽게, Detect 결과 추출!
from mrcnn import model as modellib

# dataset중에 임의의 파일을 한개 선택. 
#image_id = np.random.choice(dataset.image_ids)
image_id = 5
image, image_meta, gt_class_id, gt_bbox, gt_mask=modellib.load_image_gt(dataset_val, infer_config, image_id, use_mini_mask=False)
info = dataset_val.image_info[image_id]
print("image ID: {}.{} ({}) {}".format(info["source"], info["id"], image_id, 
                                       dataset_val.image_reference(image_id)))

# Run object detection
results = model.detect([image], verbose=1)

image

r = results[0]
visualize.display_instances(image, r['rois'], r['masks'], r['class_ids'], 
                            dataset_val.class_names, r['scores'], 
                            title="Predictions")

drawing

9. Detect 결과에서 풍선만 칼라로. 나머지는 흑백으로 바꾸자.

#Mask_RCNN 패키지의 samples/balloon 디렉토리의 balloon.py 를 import 한다. 
ROOT_DIR = os.path.abspath(".")
sys.path.append(os.path.join(ROOT_DIR, "Mask_RCNN/samples/balloon/"))

import balloon
from mrcnn.visualize import display_images

splash = balloon.color_splash(image, r['masks'])
display_images([splash], cols=1)

drawing

  • balloon.py 내부의 color_splash 함수는 다음과 같다.
def color_splash(image, mask):
    """Apply color splash effect.
    image: RGB image [height, width, 3]
    mask: instance segmentation mask [height, width, instance count]
    Returns result image. (풍선을 제외하고 Gray로 변환하기)
    """
    # '칼라->흑백->칼라' 과정을 거쳐서, gray 값을 3 depth로 가지는 3채널 이미지 만듬
    gray = skimage.color.gray2rgb(skimage.color.rgb2gray(image)) * 255
    # Copy color pixels from the original color image where mask is set
    if mask.shape[-1] > 0:
        # We're treating all instances as one, so collapse the mask into one layer
        mask = (np.sum(mask, -1, keepdims=True) >= 1) # 전체 풍선에 대해서, 풍선이 위치했던 곳에 대한 Mask 정보(True&False) 추출
        # An array with elements from x where condition is True, and elements from y elsewhere.
        # https://numpy.org/doc/stable/reference/generated/numpy.where.html
        splash = np.where(mask, image, gray).astype(np.uint8)
    else:
        splash = gray.astype(np.uint8)
    return splash
  • 어떻게 위와 같은 함수가 동작할까?
print('image shape:',image.shape, 'r mask shape:',r['masks'].shape)
mask = (np.sum(r['masks'], -1, keepdims=True) >= 1)
print('sum mask shape:',mask.shape)
  • np.sum() 테스트
import numpy as np
a = np.ones((10, 10, 3))
#print(a)
#print(np.sum(a))
print(np.sum(a, axis=-1).shape)             # 그냥 2차원 배열이다.
print(np.sum(a, -1, keepdims=True).shape)   # 3차원 배열의 가장 첫번쨰 원소에 2차원 배열이 들어가 있고, 그 2차원 배열 shape가 10*10 이다.
print(np.sum(a, -1, keepdims=True) >=1 )
print(np.sum(a, -1, keepdims=True)[:,:,0])

(10, 10)
(10, 10, 1)
  • np.where() 테스트
test_mask = (np.sum(a, -1, keepdims=True) >=1)
print(test_mask.shape)
for i in range(5):
    for j in range(5):
        test_mask[i, j, 0] = False
        
test_image = np.ones((10, 10, 3))
test_gray = np.zeros((10, 10, 3))
np.where(test_mask, test_image, test_gray)[:,:,0]
(10, 10, 1)


array([[0., 0., 0., 0., 0., 1., 1., 1., 1., 1.],
       [0., 0., 0., 0., 0., 1., 1., 1., 1., 1.],
       [0., 0., 0., 0., 0., 1., 1., 1., 1., 1.],
       [0., 0., 0., 0., 0., 1., 1., 1., 1., 1.],
       [0., 0., 0., 0., 0., 1., 1., 1., 1., 1.],
       [1., 1., 1., 1., 1., 1., 1., 1., 1., 1.],
       [1., 1., 1., 1., 1., 1., 1., 1., 1., 1.],
       [1., 1., 1., 1., 1., 1., 1., 1., 1., 1.],
       [1., 1., 1., 1., 1., 1., 1., 1., 1., 1.],
       [1., 1., 1., 1., 1., 1., 1., 1., 1., 1.]])

10. Video에 Inferece 적용 후 color splash를 적용.

from IPython.display import clear_output, Image, display, Video, HTML
Video('../../data/video/balloon_dog02.mp4')
  • Video color splash를 적용한 함수를 생성해보자.
  • 이전부터 사용했던, cv2.VideoCapture 그대로를 사용할 것이다!
import cv2
import time

def detect_video_color_splash(model, video_input_path=None, video_output_path=None):

    cap = cv2.VideoCapture(video_input_path)
    codec = cv2.VideoWriter_fourcc(*'XVID')
    fps = round(cap.get(cv2.CAP_PROP_FPS))
    vid_writer = cv2.VideoWriter(video_output_path, codec, fps, (round(cap.get(cv2.CAP_PROP_FRAME_WIDTH)),
                                                                 round(cap.get(cv2.CAP_PROP_FRAME_HEIGHT))))

    total = int(cap.get(cv2.CAP_PROP_FRAME_COUNT))
    print("총 Frame 개수: {0:}".format(total))

    frame_index = 0
    success = True
    while True:
        
        hasFrame, image_frame = cap.read()
        if not hasFrame:
            print('End of frame')
            break
        frame_index += 1
        print("frame index:{0:}".format(frame_index), end=" ")
        
        # OpenCV returns images as BGR, convert to RGB
        image_frame = image_frame[..., ::-1] 
        # ::-1은 slice step. 시작은 무조건 0 끝은 len
        print('End of frame')
            break
        frame_index += 1
        print("frame index:{0:}".format(frame_index), end=" ")
        
        # OpenCV returns images as BGR, convert to RGB
        image_frame = image_frame[..., ::-1] 
        # ::-1은 slice step. 시작은 무조건 0 끝은 len
        # https://numpy.org/doc/stable/user/basics.indexing.html#combining-index-arrays-with-slices 참조
        start=time.time()
        # Detect objects
        r = model.detect([image_frame], verbose=0)[0]
        print('detected time:', time.time()-start)
        # Color splash
        splash = color_splash(image_frame, r['masks'])
        # RGB -> BGR to save image to video
        splash = splash[..., ::-1] 
        # Add image to video writer
        vid_writer.write(splash)
    
    vid_writer.release()
    cap.release()       
    
    print("Saved to ", video_output_path)
    
detect_video_color_splash(model, video_input_path='../../data/video/balloon_dog02.mp4', 
                          video_output_path='../../data/output/balloon_dog02_output.avi')

  File "<ipython-input-20-f12d9e351b0b>", line 30
    break
    ^
IndentationError: unexpected indent
  • numpy index 머리가 너무 아프지만, 알아두면 분명히 좋을 것이다. 일단 필수 사이트는 아래와 같다
  • 참조사이트 : https://numpy.org/doc/stable/user/basics.indexing.html

      >>> y
      array([[ 0,  1,  2,  3,  4,  5,  6],
             [ 7,  8,  9, 10, 11, 12, 13],
             [14, 15, 16, 17, 18, 19, 20],
             [21, 22, 23, 24, 25, 26, 27],
             [28, 29, 30, 31, 32, 33, 34]])
      >>> y[0][1]
      1
      >>> y[0,1]
      1
      >>> y[1]
      array([ 7,  8,  9, 10, 11, 12, 13])
      >>> y[3]
      array([21, 22, 23, 24, 25, 26, 27])
      >>> y[[1,3]]
      array([[ 7,  8,  9, 10, 11, 12, 13],
             [21, 22, 23, 24, 25, 26, 27]])
      >>> y[1:5:2]
      array([[ 7,  8,  9, 10, 11, 12, 13],
             [21, 22, 23, 24, 25, 26, 27]])
      >>> y[1:5:2,[0,3,6]]
      array([[ 7, 10, 13],
             [21, 24, 27]])
      >>> y[1:5:2,::3]
      array([[ 7, 10, 13],
             [21, 24, 27]])
    
      >>> z[1,...,2]
      array([[29, 32, 35],
             [38, 41, 44],
             [47, 50, 53]])
      >>> z[1,:,:,2]
      array([[29, 32, 35],
             [38, 41, 44],
             [47, 50, 53]])
      >>> z[1] == z[1,:,:,:]
      True
      >>> z[1,...,2] == z[1,:,:,2]
      True # 즉( :,:,:,: 을 줄여쓰고 싶면 ... 을 사용하면 된다.)
    
  • 생성된 Output 파일을 Object Storage에 저장한 뒤 확인
!gsutil cp ../../data/output/balloon_dog02_output.avi gs://my_bucket_dlcv/data/output/balloon_dog02_output.avi

5. 데이터 학습을 위한 전체 흐름도

drawing

【Keras】Keras기반 Mask-RCNN - 오픈 소스 코드로 Inference

Keras 기반 Mask-RCNN를 이용해 Inference 를 수행해보자

  • /DLCV/Segmentation/mask_rcnn/Matterport패키지를_이용한_Segmentation.ipynb 파일 참조
  • Keras 기반, Mask RNN위한 최고의 오픈소스 코드 사용
  • matterport는 3D비전 회사

1. matterport/Mask_RCNN의 특징

  • 장점
    • 최적화 된 Mask RCNN 알고리즘으로 보다 뛰어난 성능
    • 전 세계에서 다양한 분야에서 사용 중
    • 다양한 편의 기능을 제공 및 이해를 위한 여러 샘플 코드 및 Document 제공
    • Mask Rcnn, Faster Rcnn을 이해하는데도 큰 도움을 주는 코드
    • 쉬운 Config 설정
  • 단점
    • Coco Dataset 포맷을 기반의 Generator를 사용해서, 원하는 데이터를 COCO 형태로 변환 필요
    • voc(xml)는 coco(json)로 바꾸면 된다.
    • (너무 친절해서) 자체 시각화 기능이 Matplotlib으로 되어 있어서 영상 Segmentation시 costomization 필요
    • COCO 데이터세트를 기반으로 하는 Evaluation을 한다. 따라서 자체적은 Evalution은 없고, COCO data의 PycocoTools Evaluation API을 사용한다.
  • 여러가지 프로젝트에서 이 페키지를 사용한 다양한 응용 에플리케이션 등이 있다.
  • 꾸준히 업그레이드가 되고 있다.
  • 시간을 충분히 투자해서 공부해도 좋은 페키지이다.
  • 제공되는 많은 sample 코드들을 공부하면 많은 도움이 된다.

2. matterport/Mask_RCNN으로 Inference 수행하기

  • Keras 2.2 version, Tensorflow 1.13 을 사용한다.
  • 코랩 사용한다면, 코랩 전용 압축 파일 참고해서 matterport/Mask_RCNN패키지의 main.py파일 바꾸기

  • 설치하기
      $ git clone https://github.com/matterport/Mask_RCNN.git
      $ cd Mask-RCNN
      $ pip install -r requirements.txt
      $ python setup.py install
    

    Setup을 이렇게 하고 나면, ./mrcnn/model.py ./mrcnn/utils.py 를 import해서 사용할 수 있게 된다.

  • ./mrcnn 내부의 파일 알아보기
    • config.py : 환경설정의 Defalut 값을 가진다(모두 대문자)
    • parallel_model.py : GPU 2개 이상 사용할 때
    • model.py : 모델에 관련된 핵심적인 함수, 클래스들이 들어 있다.
    • utils.py : coco dataset generater 를 사용한다.
    • visualization.py : 시각화를 위한 편리한 기능.(너무 편리하게 해놔서 문제), matplotlib, skimage를 사용하기 때문에, 영상 처리 시각화를 위해서 customization이 필요하다.

3. sample을 이용해서 코드를 이해해보자.

  • /DLCV/Segmentation/mask_rcnn/Matterport패키지를_이용한_Segmentation.ipynb 파일 참조

1. Matterport 패키지 모듈 및 클래스 활용

  • pretrained coco 모델을 로딩 후 단일 이미지와 영상 Segmentation 수행.
import os
import sys
import random
import math
import numpy as np
import cv2

drawing

  • python setup.py install 함으로써 mrcnn이 우리 python의 모듈이 되었다. import numpy하는 것처럼, import mncnn을 해서 사용할 수 있게 되었다.
  • class.__dict__, object.__dict__, module.__dict__ 를 사용하면 내부의 맴버 함수나 클래스, 객체, 모듈에 대한 정보를 알 수 있다. 참고 stackoverflow
from mrcnn import utils
import mrcnn.model as modellib
from mrcnn import visualize
  • Matterport로 pretrained된 coco weight 모델을 다운로드함(최초시)
  • utils.download_trained_weights에 있음
# URL from which to download the latest COCO trained weights
COCO_MODEL_URL = "https://github.com/matterport/Mask_RCNN/releases/download/v2.0/mask_rcnn_coco.h5"
with urllib.request.urlopen(COCO_MODEL_URL) as resp, open(coco_model_path, 'wb') as out:
        shutil.copyfileobj(resp, out)
from mrcnn import utils

ROOT_DIR = os.path.abspath('.')

# 최초에는 coco pretrained 모델을 다운로드함. 
COCO_MODEL_PATH = os.path.join(ROOT_DIR, "./pretrained/mask_rcnn_coco.h5")

if not os.path.exists(COCO_MODEL_PATH):
    utils.download_trained_weights(COCO_MODEL_PATH)
!ls ~/DLCV/Segmentation/mask_rcnn/pretrained
mask_rcnn_coco.h5
mask_rcnn_inception_v2_coco_2018_01_28
mask_rcnn_inception_v2_coco_2018_01_28.tar.gz
  • MASK RCNN 모델을 위한 Config 클래스의 객체 생성 설정
  • mrcnn/utile/config.py

  • config 객체 생성 1 방법
from mrcnn.config import Config

infer_config = Config()
infer_config.BATCH_SIZE=1
infer_config.display()   # config 정보들이 쭉 print된다.
Configurations:
BACKBONE                       resnet101
BACKBONE_STRIDES               [4, 8, 16, 32, 64]
BATCH_SIZE                     1
BBOX_STD_DEV                   [0.1 0.1 0.2 0.2]
COMPUTE_BACKBONE_SHAPE         None
DETECTION_MAX_INSTANCES        100
DETECTION_MIN_CONFIDENCE       0.7
DETECTION_NMS_THRESHOLD        0.3
FPN_CLASSIF_FC_LAYERS_SIZE     1024
GPU_COUNT                      1
GRADIENT_CLIP_NORM             5.0
IMAGES_PER_GPU                 2
IMAGE_CHANNEL_COUNT            3
IMAGE_MAX_DIM                  1024
IMAGE_META_SIZE                13
IMAGE_MIN_DIM                  800
IMAGE_MIN_SCALE                0
IMAGE_RESIZE_MODE              square
IMAGE_SHAPE                    [1024 1024    3]
LEARNING_MOMENTUM              0.9
LEARNING_RATE                  0.001
LOSS_WEIGHTS                   {'rpn_class_loss': 1.0, 'rpn_bbox_loss': 1.0, 'mrcnn_class_loss': 1.0, 'mrcnn_bbox_loss': 1.0, 'mrcnn_mask_loss': 1.0}
MASK_POOL_SIZE                 14
MASK_SHAPE                     [28, 28]
MAX_GT_INSTANCES               100
MEAN_PIXEL                     [123.7 116.8 103.9]
MINI_MASK_SHAPE                (56, 56)
NAME                           None
NUM_CLASSES                    1
POOL_SIZE                      7
POST_NMS_ROIS_INFERENCE        1000
POST_NMS_ROIS_TRAINING         2000
PRE_NMS_LIMIT                  6000
ROI_POSITIVE_RATIO             0.33
RPN_ANCHOR_RATIOS              [0.5, 1, 2]
RPN_ANCHOR_SCALES              (32, 64, 128, 256, 512)
RPN_ANCHOR_STRIDE              1
RPN_BBOX_STD_DEV               [0.1 0.1 0.2 0.2]
RPN_NMS_THRESHOLD              0.7
RPN_TRAIN_ANCHORS_PER_IMAGE    256
STEPS_PER_EPOCH                1000
TOP_DOWN_PYRAMID_SIZE          256
TRAIN_BN                       False
TRAIN_ROIS_PER_IMAGE           200
USE_MINI_MASK                  True
USE_RPN_ROIS                   True
VALIDATION_STEPS               50
WEIGHT_DECAY                   0.0001
  • config 객체 생성 2 방법
# Config 클래스를 상속받아서 사용
from mrcnn.config import Config

#환경 변수는 모두 대문자 
class InferenceConfig(Config):
    # inference시에는 batch size를 1로 설정. 그리고 IMAGES_PER_GPU도 1로 설정. 
    GPU_COUNT = 1
    IMAGES_PER_GPU = 1 # BATCH_SIZE=1 과 같은 효과
    # NAME은 반드시 주어야 한다. 
    NAME='coco_infer'  # NAME을 꼭 주어야 한다.
    NUM_CLASSES=81     # Background 0번 + coco 80개 
    

infer_config = InferenceConfig()
# infer_config.display()
  • COCO ID와 클래스명 매핑
# matterport는 0을 Background로, 1부터 80까지 coco dataset 클래스 id/클래스 명 매핑. 
labels_to_names = {0:'BG',1: 'person',2: 'bicycle',3: 'car',4: 'motorbike',5: 'aeroplane',6: 'bus',7: 'train',8: 'truck',9: 'boat',10: 'traffic light',
                   11: 'fire hydrant',12: 'stop sign',13: 'parking meter',14: 'bench',15: 'bird',16: 'cat',17: 'dog',18: 'horse',19: 'sheep',20: 'cow',
                   21: 'elephant',22: 'bear',23: 'zebra',24: 'giraffe',25: 'backpack',26: 'umbrella',27: 'handbag',28: 'tie',29: 'suitcase',30: 'frisbee',
                   31: 'skis',32: 'snowboard',33: 'sports ball',34: 'kite',35: 'baseball bat',36: 'baseball glove',37: 'skateboard',38: 'surfboard',39: 'tennis racket',40: 'bottle',
                   41: 'wine glass',42: 'cup',43: 'fork',44: 'knife',45: 'spoon',46: 'bowl',47: 'banana',48: 'apple',49: 'sandwich',50: 'orange',
                   51: 'broccoli',52: 'carrot',53: 'hot dog',54: 'pizza',55: 'donut',56: 'cake',57: 'chair',58: 'sofa',59: 'pottedplant',60: 'bed',
                   61: 'diningtable',62: 'toilet',63: 'tvmonitor',64: 'laptop',65: 'mouse',66: 'remote', 67: 'keyboard',68: 'cell phone',69: 'microwave',70: 'oven',
                   71: 'toaster',72: 'sink',73: 'refrigerator',74: 'book',75: 'clock',76: 'vase',77: 'scissors',78: 'teddy bear',79: 'hair drier',80: 'toothbrush' }

2. Inferecne 모델 구축 및 pretrained 사용

  • 아래 과정 정리
    1. mrcnn.model.MaskRCNN Class를 사용해서 객체를 생성한다.
    2. 기본적인 신경망 모델 객체가 생성됐다. weigts import 안함
      (3. InferenceConfig의 Name 설정안하면 에러 발생.)
    3. model object 생성!
    4. 이제 이 model을 가지고
      model.detect([cv2 read img])하면 inference 수행 끝!
# MS-COCO 기반으로 Pretrained 된 모델을 로딩
# snapshots 폴더 만들어 놓아야 함.
# model_dir는 보통 epoch마다 파일 저장하는 폴더 인데... inference랑 상관없지만..
import mrcnn.model as modellib

MODEL_DIR = os.path.join(ROOT_DIR,'snapshots') 
print(MODEL_DIR)
model = modellib.MaskRCNN(mode="inference",  model_dir=MODEL_DIR, config=infer_config) # snapshots에는 아무 지솓 안하니 걱정 ㄴ

model.load_weights(COCO_MODEL_PATH, by_name=True)
/home/sb020518/DLCV/Segmentation/mask_rcnn/snapshots

3. Inference 수행

import matplotlib.pyplot as plt
%matplotlib inline 

beatles_img = cv2.imread('../../data/image/beatles01.jpg')
# matterport는 내부적으로 image처리를 위해 skimage를 이용하므로 BGR2RGB처리함. 
beatles_img_rgb = cv2.cvtColor(beatles_img, cv2.COLOR_BGR2RGB)
 
results = model.detect([beatles_img_rgb], verbose=1)
# verbose를 하면 정보를 출력해준다.
Processing 1 images
image                    shape: (633, 806, 3)         min:    0.00000  max:  255.00000  uint8
molded_images            shape: (1, 1024, 1024, 3)    min: -123.70000  max:  151.10000  float64
image_metas              shape: (1, 93)               min:    0.00000  max: 1024.00000  float64
anchors                  shape: (1, 261888, 4)        min:   -0.35390  max:    1.29134  float32
print(type(results))
print(len(results))
print(type(results[0]))
print(results[0].keys())
print(type(results[0]['class_ids']))
print(results[0]['class_ids'].shape) # 18개의 객체 발견
# 각각 Region of interest, class ID, Confidence, Mask 정보
<class 'list'>
1
<class 'dict'>
dict_keys(['rois', 'class_ids', 'scores', 'masks'])
<class 'numpy.ndarray'>
(18,)
# results[0]['masks']는 object 별로 mask가 전체 이미지에 대해서 layered된 image 배열을 가지고 있음.  
results[0]['rois'].shape, results[0]['scores'].shape, results[0]['class_ids'].shape, results[0]['masks'].shape
((18, 4), (18,), (18,), (633, 806, 18))
  • result 정보 분석하기
    • (18, 4) : 18개의 bounding box 좌상단 우하단
    • (18,) : 18개의 클래스 ID
    • (18,) : 18개의 confidence
    • (633, 806, 18) : input 이미지가 (633, 806, 3)였다. (633, 806)에 대한 false true 정보가 담겨 있다
  • 이 정보를 visualize 함수로 쉽게 시각화 할 수 있다.

지금까지의 모델 중 가장 안정성과 성능이 뛰어난 것을 확인할 수 있다. 아주 최적화가 잘 된 패키지이다. 미친 성능이다.

from mrcnn import visualize

r = results[0]
class_names = [value for value in labels_to_names.values()]
visualize.display_instances(beatles_img_rgb, r['rois'], r['masks'], r['class_ids'], 
                            class_names, r['scores'])

drawing

4. Inference 수행 작업만 함수화

import time

wick_img = cv2.imread('../../data/image/john_wick01.jpg')
wick_img_rgb = cv2.cvtColor(wick_img, cv2.COLOR_BGR2RGB)

def get_segment_result(img_array_list, verbose):
    
    start_time = time.time()
    results = model.detect(img_array_list, verbose=1)
    
    if verbose==1:
        print('## inference time:{0:}'.format(time.time()-start_time))
    
    return results

r = get_segment_result([wick_img_rgb], verbose=1)[0]
visualize.display_instances(wick_img_rgb, r['rois'], r['masks'], r['class_ids'], 
                            class_names, r['scores'])

cpu로 24초 소요. P100으로 0.1ch thdy

drawing

5. 위의 함수로 Video에 Segmentation 활용

  • MaskRCNN 패키지는 visualize.display_instances() 함수내부에서 matplotlib를 이용하여 자체 시각화를 수행.
  • 따라서 우리는 이미지를 결과로 얻고 싶은데 matplotlib를 그냥 해버리니 우리가 직접 이미지 결과 추출 함수 구현
  • visualize.display_instances() 코드 보기 - 처음부터 _, ax = plt.subplots(1, figsize=figsize) 객체를 선언해서 쭈욱 그려나가는 모습을 볼 수 있다.
  • 이 코드의 대부분을 차용해서 아래의 get_segmented_image 함수를 정의한다.
  • visualize.display_instances()에서는 matplot.show으로 함수를 마무리 하지만, get_segmented_image는 최종으로 그려진 이미지를 return한다.
  • visualize.display_instances()에서는 from matplotlib.patches import Polygon 으로 함수를 사용 하지만, get_segmented_image는 cv2.polylines를 사용한다.
from mrcnn.visualize import *
import cv2

def get_segmented_image(img_array, boxes, masks, class_ids, class_names,
                      scores=None, show_mask=True, show_bbox=True, colors=None, captions=None):
   
    # Number of instances
    N = boxes.shape[0]
    if not N:
        print("\n*** No instances to display *** \n")
    else:
        assert boxes.shape[0] == masks.shape[-1] == class_ids.shape[0]
    

    # Generate random colors
    colors = colors or random_colors(N)

    # Show area outside image boundaries.
    height, width = img_array.shape[:2]

    masked_image = img_array.astype(np.uint32).copy()

    for i in range(N):
        color = np.array(colors[i])*255
        color = color.tolist()

        # Bounding box 그리기
        if not np.any(boxes[i]):
            # Skip this instance. Has no bbox. Likely lost in image cropping.
            continue
        y1, x1, y2, x2 = boxes[i]
        
        if show_bbox:
            cv2.rectangle(img_array, (x1, y1), (x2, y2), color, thickness=1 )

        # Label 표시하기
        if not captions:
            class_id = class_ids[i]
            score = scores[i] if scores is not None else None
            label = class_names[class_id]
            caption = "{} {:.3f}".format(label, score) if score else label
        else:
            caption = captions[i]
            
        cv2.putText(img_array, caption, (x1, y1+8), cv2.FONT_HERSHEY_SIMPLEX, 0.4, (255, 255, 255), thickness=1)
        
        # Mask 정보 그려 넣기
        # 클래스별 mask 정보를 추출 
        mask = masks[:, :, i]
        if show_mask:
            # visualize 모듈의 apply_mask()를 적용하여 masking 수행. 
            # from mrcnn.visualize import * 모든 함수 import
            img_array = apply_mask(img_array, mask, color)
            
            # mask에 contour 적용. 
            padded_mask = np.zeros(
                            (mask.shape[0] + 2, mask.shape[1] + 2), dtype=np.uint8)
            padded_mask[1:-1, 1:-1] = mask
            contours = find_contours(padded_mask, 0.5)
            for verts in contours:
                # padding 제거. 아래에서 verts를 32bit integer로 변경해야 polylines()에서 오류 발생하지 않음. 
                verts = verts.astype(np.int32)
                #x, y 좌표 교체
                verts = np.fliplr(verts) - 1
                cv2.polylines(img_array, [verts], True, color, thickness=1)
    
    return img_array

단일 IMAGE에 적용

import time

wick_img = cv2.imread('../../data/image/john_wick01.jpg')
wick_img_rgb = cv2.cvtColor(wick_img, cv2.COLOR_BGR2RGB)

r = get_segment_result([wick_img_rgb], verbose=1)[0]
segmented_img = get_segmented_image(wick_img_rgb, r['rois'], r['masks'], r['class_ids'], 
                                    class_names, r['scores'])

plt.figure(figsize=(16, 16))
plt.imshow(segmented_img)

Video Segmentation 적용

import time

video_input_path = '../../data/video/John_Wick_small.mp4'
# video output 의 포맷은 avi 로 반드시 설정 필요. 
video_output_path = '../../data/output/John_Wick_small_matterport01.avi'

cap = cv2.VideoCapture(video_input_path)
codec = cv2.VideoWriter_fourcc(*'XVID')
fps = round(cap.get(cv2.CAP_PROP_FPS))

vid_writer = cv2.VideoWriter(video_output_path, codec, fps, (round(cap.get(cv2.CAP_PROP_FRAME_WIDTH)),round(cap.get(cv2.CAP_PROP_FRAME_HEIGHT))))

total = int(cap.get(cv2.CAP_PROP_FRAME_COUNT))
print("총 Frame 개수: {0:}".format(total))

frame_index = 0
while True:
    
    hasFrame, image_frame = cap.read()
    if not hasFrame:
        print('End of frame')
        break
    
    frame_index += 1
    print("frame index:{0:}".format(frame_index), end=" ")
    r = get_segment_result([image_frame], verbose=1)[0]
    segmented_img = get_segmented_image(image_frame, r['rois'], r['masks'], r['class_ids'], 
                                    class_names, r['scores'])
    vid_writer.write(segmented_img)
    
vid_writer.release()
cap.release()       
!gsutil cp ../../data/output/John_Wick_small_matterport01.avi gs://my_bucket_dlcv/data/output/John_Wick_small_matterport01.avi

drawing

다른 동영상에 적용.

video_input_path = '../../data/video/London_Street.mp4'
# video output 의 포맷은 avi 로 반드시 설정 필요. 
video_output_path = '../../data/output/London_Street_matterport01.avi'

cap = cv2.VideoCapture(video_input_path)
codec = cv2.VideoWriter_fourcc(*'XVID')
fps = round(cap.get(cv2.CAP_PROP_FPS))
vid_writer = cv2.VideoWriter(video_output_path, codec, fps, (round(cap.get(cv2.CAP_PROP_FRAME_WIDTH)),round(cap.get(cv2.CAP_PROP_FRAME_HEIGHT))))

total = int(cap.get(cv2.CAP_PROP_FRAME_COUNT))
print("총 Frame 개수: {0:}".format(total))

import time

frame_index = 0
while True:
    
    hasFrame, image_frame = cap.read()
    if not hasFrame:
        print('End of frame')
        break
    
    frame_index += 1
    print("frame index:{0:}".format(frame_index), end=" ")
    r = get_segment_result([image_frame], verbose=1)[0]
    segmented_img = get_segmented_image(image_frame, r['rois'], r['masks'], r['class_ids'], 
                                    class_names, r['scores'])
    vid_writer.write(segmented_img)
    
vid_writer.release()
cap.release()       

!gsutil cp ../../data/output/London_Street_matterport01.avi gs://my_bucket_dlcv/data/output/London_Street_matterport01.avi

drawing

【Tensorflow】Mask-RCNN inference 수행하기

Tensorflow v1.3 API로, Mask-RCNN inference 수행하기
/DLCV/Segmentation/mask_rcnn/Tensorflow를_이용한_Mask_RCNN_Segmentation.ipynb 참고하기
이번 post를 참고해서, Tensorflofw inference 흐름 파악하기

1. 이미지 Read

  • Tensorflow에서 Pretrained 된 Inference모델(Frozen graph)을 다운로드 받은 후 이를 이용해 OpenCV에서 Inference 모델 생성
  • 이전 post에서 다운 받은 .pb 파일 그대로 사용할 예정
    • https://github.com/opencv/opencv/wiki/TensorFlow-Object-Detection-API 에 다운로드 URL 있음.
import cv2
import matplotlib.pyplot as plt
import numpy  as np
%matplotlib inline

beatles_img = cv2.imread('../../data/image/driving2.jpg')
beatles_img_rgb = cv2.cvtColor(beatles_img, cv2.COLOR_BGR2RGB)

plt.figure(figsize=(12, 12))
plt.imshow(beatles_img_rgb)

drawing

# coco dataset의 클래스 ID별 클래스명 매핑
labels_to_names = {1:'person',2:'bicycle',3:'car',4:'motorcycle',5:'airplane',6:'bus',7:'train',8:'truck',9:'boat',10:'traffic light',
                    11:'fire hydrant',12:'street sign',13:'stop sign',14:'parking meter',15:'bench',16:'bird',17:'cat',18:'dog',19:'horse',20:'sheep',
                    21:'cow',22:'elephant',23:'bear',24:'zebra',25:'giraffe',26:'hat',27:'backpack',28:'umbrella',29:'shoe',30:'eye glasses',
                    31:'handbag',32:'tie',33:'suitcase',34:'frisbee',35:'skis',36:'snowboard',37:'sports ball',38:'kite',39:'baseball bat',40:'baseball glove',
                    41:'skateboard',42:'surfboard',43:'tennis racket',44:'bottle',45:'plate',46:'wine glass',47:'cup',48:'fork',49:'knife',50:'spoon',
                    51:'bowl',52:'banana',53:'apple',54:'sandwich',55:'orange',56:'broccoli',57:'carrot',58:'hot dog',59:'pizza',60:'donut',
                    61:'cake',62:'chair',63:'couch',64:'potted plant',65:'bed',66:'mirror',67:'dining table',68:'window',69:'desk',70:'toilet',
                    71:'door',72:'tv',73:'laptop',74:'mouse',75:'remote',76:'keyboard',77:'cell phone',78:'microwave',79:'oven',80:'toaster',
                    81:'sink',82:'refrigerator',83:'blender',84:'book',85:'clock',86:'vase',87:'scissors',88:'teddy bear',89:'hair drier',90:'toothbrush',
                    91:'hair brush'}


#masking 시 클래스별 컬러 적용
colors = list(
    [[0, 255, 0],
     [0, 0, 255],
     [255, 0, 0],
     [0, 255, 255],
     [255, 255, 0],
     [255, 0, 255],
     [80, 70, 180],
     [250, 80, 190],
     [245, 145, 50],
     [70, 150, 250],
     [50, 190, 190]] )

2. import graph & 한 이미지 Inference

  • tensorflow inference 수행하기
  • 아래의 내용이 이해가 알될 수도 있다. 그러면 꼭 이전 post(OpenCV-Maskrcnn) 참고하기
  • 주의! sess.run 할 때, 이전과 다르게 graph.get_tensor_by_name(‘detection_masks:0’)도 가져와야한다.
import numpy as np
import tensorflow as tf
import cv2
import time
import matplotlib.pyplot as plt
%matplotlib inline


#inference graph를 읽음. .
with tf.gfile.FastGFile('./pretrained/mask_rcnn_inception_v2_coco_2018_01_28/frozen_inference_graph.pb', 'rb') as f:
    graph_def = tf.GraphDef()
    graph_def.ParseFromString(f.read())
    
with tf.Session() as sess:
    # Session 시작하고 inference graph 모델 로딩 
    sess.graph.as_default()
    tf.import_graph_def(graph_def, name='')
    
    # 입력 이미지 생성 및 BGR을 RGB로 변경 
    img = cv2.imread('../../data/image/driving2.jpg')
    draw_img = img.copy()
    
    img_height = img.shape[0]
    img_width = img.shape[1]
    #inp = cv2.resize(img, (300, 300))
    # OpenCV로 입력받은 BGR 이미지를 RGB 이미지로 변환 
    inp = img[:, :, [2, 1, 0]] 

    start = time.time()
    # Object Detection 수행 및 mask 정보 추출. 'detection_masks:0' 에서 mask결과 추출 
    out = sess.run([sess.graph.get_tensor_by_name('num_detections:0'),
                    sess.graph.get_tensor_by_name('detection_scores:0'),
                    sess.graph.get_tensor_by_name('detection_boxes:0'),
                    sess.graph.get_tensor_by_name('detection_classes:0'),
                    sess.graph.get_tensor_by_name('detection_masks:0')],
                   feed_dict={'image_tensor:0': inp.reshape(1, inp.shape[0], inp.shape[1], 3)})
    
    green_color=(0, 255, 0)
    red_color=(0, 0, 255)
    score_threshold = 0.5
    mask_threshold = 0.4
    
    #### out 결과, 타입 Debugging #### 
    print("### out 크기와 타입:", len(out), type(out))
    print(out[0].shape, out[1].shape, out[2].shape, out[3].shape, out[4].shape)
    print('num_detection:',out[0], 'score by objects:', out[1][0], 'bounding box')
    # Bounding Box 시각화 
    # Detect된 Object 별로 bounding box 시각화 
    num_detections = int(out[0][0])
    for i in range(num_detections):
        # Object별 class id와 object class score, bounding box정보를 추출
        classId = int(out[3][0][i])
        score = float(out[1][0][i])
        bbox = [float(v) for v in out[2][0][i]]
        # Object별 mask 정보 추출
        classMask = out[4][0][i]
        
        if score > score_threshold:
            left = int(bbox[1] * img_width)
            top = int(bbox[0] * img_height)
            right = int(bbox[3] * img_width)
            bottom = int(bbox[2] * img_height)
            # cv2의 rectangle(), putText()로 bounding box의 클래스명 시각화 
            cv2.rectangle(draw_img, (left, top), (right,bottom ), green_color, thickness=2)
            caption = "{}: {:.4f}".format(labels_to_names[classId], score)
            print(caption)
            cv2.putText(draw_img, caption, (int(left), int(top - 5)), cv2.FONT_HERSHEY_SIMPLEX, 0.4, red_color, 1)
            
            # 원본 이미지의 object 크기에 맞춰 mask 크기 scale out 
            scaled_classMask = cv2.resize(classMask, (right - left + 1, bottom - top + 1))
            print('원본 이미지 비율로 scale out된 classMask shape:', scaled_classMask.shape)
            # 지정된 mask Threshold 값 이상인지 True, False boolean형태의 mask 정보 생성. 
            s_mask_b = (scaled_classMask > mask_threshold)
            print('scaled mask shape:', s_mask_b.shape, 'scaled mask pixel count:', s_mask_b.shape[0]*s_mask_b.shape[1],
                  'scaled mask true shape:',s_mask_b[s_mask_b==True].shape, 
                  'scaled mask False shape:', s_mask_b[s_mask_b==False].shape)
            
            # mask를 적용할 bounding box 영역의 image 추출
            before_mask_roi = draw_img[top:bottom+1, left:right+1]
            print('before_mask_roi:', before_mask_roi.shape)
            
            
            # Detect된 Object에 mask를 특정 투명 컬러로 적용. 
            colorIndex = np.random.randint(0, len(colors)-1)
            color = colors[colorIndex]
            after_mask_roi = draw_img[top:bottom+1, left:right+1][s_mask_b]
            draw_img[top:bottom+1, left:right+1][s_mask_b] = ([0.3*color[0], 0.3*color[1], 0.3*color[2]] + 0.6 * after_mask_roi).astype(np.uint8)
            # Detect된 Object에 윤곽선(contour) 적용. 
            s_mask_i = s_mask_b.astype(np.uint8)
            contours, hierarchy = cv2.findContours(s_mask_i,cv2.RETR_TREE,cv2.CHAIN_APPROX_SIMPLE)
            cv2.drawContours(draw_img[top:bottom+1, left:right+1], contours, -1, color, 1, cv2.LINE_8, hierarchy, 100)

plt.figure(figsize=(14, 14))
img_rgb = cv2.cvtColor(draw_img, cv2.COLOR_BGR2RGB)
plt.imshow(img_rgb)
plt.show()
car: 0.9624
원본 이미지 비율로 scale out된 classMask shape: (414, 510)
scaled mask shape: (414, 510) scaled mask pixel count: 211140 scaled mask true shape: (155967,) scaled mask False shape: (55173,)
before_mask_roi: (414, 510, 3)
car: 0.9441
원본 이미지 비율로 scale out된 classMask shape: (225, 251)
scaled mask shape: (225, 251) scaled mask pixel count: 56475 scaled mask true shape: (40707,) scaled mask False shape: (15768,)
before_mask_roi: (225, 251, 3)
traffic light: 0.9239
원본 이미지 비율로 scale out된 classMask shape: (91, 50)
scaled mask shape: (91, 50) scaled mask pixel count: 4550 scaled mask true shape: (4003,) scaled mask False shape: (547,)
before_mask_roi: (91, 50, 3)
car: 0.9119
원본 이미지 비율로 scale out된 classMask shape: (153, 183)
scaled mask shape: (153, 183) scaled mask pixel count: 27999 scaled mask true shape: (21834,) scaled mask False shape: (6165,)
before_mask_roi: (153, 183, 3)
car: 0.8999
원본 이미지 비율로 scale out된 classMask shape: (67, 94)
scaled mask shape: (67, 94) scaled mask pixel count: 6298 scaled mask true shape: (5041,) scaled mask False shape: (1257,)
before_mask_roi: (67, 94, 3)

drawing

3. 위의 작업 함수화 및 함수 사용

## 이전 opencv에서 선언한 get_box_info()함수에 left, top, right, bottom을 가지오는 bbox 위치 인덱스 변경
def get_box_info(bbox, img_width, img_height):
    
    left = int(bbox[1] * img_width)
    top = int(bbox[0] * img_height)
    right = int(bbox[3] * img_width)
    bottom = int(bbox[2] * img_height)
    
    left = max(0, min(left, img_width - 1))
    top = max(0, min(top, img_height - 1))
    right = max(0, min(right, img_width - 1))
    bottom = max(0, min(bottom, img_height - 1))
    
    return left, top, right, bottom

# 이전 opencv에서 선언한 draw_box()함수에 classId, score 인자가 추가됨.     
def draw_box(img_array, classId, score, box, img_width, img_height, is_print=False):
    green_color=(0, 255, 0)
    red_color=(0, 0, 255)
    
    left, top, right, bottom = get_box_info(box, img_width, img_height)
    text = "{}: {:.4f}".format(labels_to_names[classId], score)
    
    if is_print:
        pass
        #print("box:", box, "score:", score, "classId:", classId)
    
    cv2.rectangle(img_array, (left, top), (right, bottom), green_color, thickness=2 )
    cv2.putText(img_array, text, (left, top-3), cv2.FONT_HERSHEY_SIMPLEX, 0.5, red_color, thickness=1)
    
    return img_array
    
def draw_mask(img_array, bbox, classMask, img_width, img_height, mask_threshold, is_print=False):
        
        left, top, right, bottom = get_box_info(bbox, img_width, img_height)
        # 원본 이미지의 object 크기에 맞춰 mask 크기 scale out 
        scaled_classMask = cv2.resize(classMask, (right - left + 1, bottom - top + 1))
        s_mask_b = (scaled_classMask > mask_threshold)
        before_mask_roi = img_array[top:bottom+1, left:right+1]
        
        # mask를 적용할 bounding box 영역의 image 추출하고 투명 color 적용. 
        colorIndex = np.random.randint(0, len(colors)-1)
        #color = colors[colorIndex]
        color=(224, 32, 180)
        after_mask_roi = img_array[top:bottom+1, left:right+1][s_mask_b]
        img_array[top:bottom+1, left:right+1][s_mask_b] = ([0.3*color[0], 0.3*color[1], 0.3*color[2]] + 0.6 * after_mask_roi).astype(np.uint8)
        # Detect된 Object에 윤곽선(contour) 적용. 
        s_mask_i = s_mask_b.astype(np.uint8)
        contours, hierarchy = cv2.findContours(s_mask_i,cv2.RETR_TREE,cv2.CHAIN_APPROX_SIMPLE)
        cv2.drawContours(img_array[top:bottom+1, left:right+1], contours, -1, color, 1, cv2.LINE_8, hierarchy, 100)
        
        return img_array
import time

def detect_image_mask_rcnn_tensor(sess, img_array, conf_threshold, mask_threshold, use_copied_array, is_print=False):
    
    draw_img = None
    if use_copied_array:
        draw_img = img_array.copy()
        #draw_img = cv2.cvtColor(draw_img, cv2.COLOR_BGR2RGB)
    else:
        draw_img = img_array
    
    img_height = img_array.shape[0]
    img_width = img_array.shape[1]
    
    # BGR을 RGB로 변환하여 INPUT IMAGE 입력 준비
    inp = img_array[:, :, [2, 1, 0]]  

    start = time.time()
    # Object Detection 수행 및 mask 정보 추출. 'detection_masks:0' 에서 mask결과 추출 
    out = sess.run([sess.graph.get_tensor_by_name('num_detections:0'),
                    sess.graph.get_tensor_by_name('detection_scores:0'),
                    sess.graph.get_tensor_by_name('detection_boxes:0'),
                    sess.graph.get_tensor_by_name('detection_classes:0'),
                    sess.graph.get_tensor_by_name('detection_masks:0')],
                   feed_dict={'image_tensor:0': inp.reshape(1, inp.shape[0], inp.shape[1], 3)})
    if is_print:
        print('Segmentation Inference time {0:}'.format(round(time.time() - start, 4)))
        
    num_detections = int(out[0][0])

    for i in range(num_detections):
        # Object별 class id와 object class score, bounding box정보를 추출
        classId = int(out[3][0][i])
        score = float(out[1][0][i])
        bbox = [float(v) for v in out[2][0][i]]
        # Object별 mask 정보 추출
        classMask = out[4][0][i]

        if score > conf_threshold:
            draw_box(img_array , classId, score, bbox, img_width, img_height, is_print=is_print)
            draw_mask(img_array, bbox, classMask, img_width, img_height, mask_threshold, is_print=is_print)
    
    return img_array
#inference graph를 읽음. .
with tf.gfile.FastGFile('./pretrained/mask_rcnn_inception_v2_coco_2018_01_28/frozen_inference_graph.pb', 'rb') as f:
    graph_def = tf.GraphDef()
    graph_def.ParseFromString(f.read())
    
with tf.Session() as sess:
    # Session 시작하고 inference graph 모델 로딩 
    sess.graph.as_default()
    tf.import_graph_def(graph_def, name='')
    
    # 입력 이미지 생성, Object Detection된 image 반환, 반환된 image의 BGR을 RGB로 변경 
    img = cv2.imread('../../data/image/beatles01.jpg')
    draw_img = detect_image_mask_rcnn_tensor(sess, img, conf_threshold=0.5, mask_threshold=0.4, use_copied_array=True, is_print=True)

img_rgb = cv2.cvtColor(draw_img, cv2.COLOR_BGR2RGB)

plt.figure(figsize=(12, 12))
plt.imshow(img_rgb)

drawing

4. 위에서 만든 함수 사용해서, Video Segmentation 적용

  • 10fps 정도의 좋은 속도가 나오는 것을 확인할 수 있다.
  • 아래에 sess.close() 가 있다. 이것은 사실이 코드가 먼저 실행 되어야 한다. 이 코드는 sess을 with로 실행 하지 않음.
    drawing
from IPython.display import clear_output, Image, display, Video, HTML
Video('../../data/video/London_Street.mp4')
video_input_path = '../../data/video/London_Street.mp4'
# linux에서 video output의 확장자는 반드시 avi 로 설정 필요. 
video_output_path = '../../data/output/London_Street_mask_rcnn_01.avi'

cap = cv2.VideoCapture(video_input_path)

codec = cv2.VideoWriter_fourcc(*'XVID')

vid_size = (round(cap.get(cv2.CAP_PROP_FRAME_WIDTH)),round(cap.get(cv2.CAP_PROP_FRAME_HEIGHT)))
vid_fps = cap.get(cv2.CAP_PROP_FPS)
    
vid_writer = cv2.VideoWriter(video_output_path, codec, vid_fps, vid_size) 

frame_cnt = int(cap.get(cv2.CAP_PROP_FRAME_COUNT))
print('총 Frame 갯수:', frame_cnt, 'FPS:', vid_fps )

frame_index = 0
while True:
    hasFrame, img_frame = cap.read()
    if not hasFrame:
        print('더 이상 처리할 frame이 없습니다.')
        break
    frame_index += 1
    print("frame index:{0:}".format(frame_index), end=" ")
    draw_img_frame = detect_image_mask_rcnn_tensor(sess, img_frame, conf_threshold=0.5, mask_threshold=0.4, use_copied_array=False, is_print=True)
    vid_writer.write(draw_img_frame)
# end of while loop

vid_writer.release()
cap.release()  

!gsutil cp ../../data/output/London_Street_mask_rcnn_01.avi gs://my_bucket_dlcv/data/output/London_Street_mask_rcnn_01.avi
sess.close()  # 

drawing

【26살】 존경하는 선생님으로 부터의 배움 정리

가끔, 이충권 선생님과 전한길 선생님의 유투브 쓴소리를 들으면서, 나의 마음을 다잡곤 한다… 그 내용을 정리해 보았다.

나는 가끔, 내가 가장 존경하는 선생님이신 이충권 선생님과 전한길 선생님의 유투브 쓴소리를 들으면서, 나의 마음을 다잡곤 한다.
‘그래. 나를 위한 인생이 아닌, 나의 소중한 사람을 위한 인생을 살아가자’
‘다른 사람이랑 비교하지말고 경쟁하지 말고, 나 스스로와 싸우자. 어제의 나와, 현재 하기 싫어하는 나와 싸워 이기자’
라는 생각을 하면서 마음을 다잡고, 다시 공부하고 다시 운동하며 다시 노력하고 다시 최선을 다 한다.

최근 면접(인성면접)을 준비하면서 나의 생각과 관점에 대해 정리할 필요가 있었다. 나의 생각과 관점 그리고 가치관이 즉! 존경하는 선생님께 배운 내용을 다시 정리해 보았다.
이러한 배움을 할 수 있다는 것에 감사하고, 이러한 가르침을 주신 이충권 선생님, 전한길 선생님 정말 정말 감사합니다…

이충권 선생님 배움 정리

  1. 자기한테 독한 사람이 자기한테 덜 독한 사람 지배하고 사는게 세상이야. 내 자신이 독하지 못하고 게으르면 절대 용서하지 않아. 몸뚱아리가 시키는 대로 한다는 자체가 자존심 상해.
  2. 깡다구로 해. 참아. 그래 봤자 니 몸이잖아. 세상을 너 혼자 산다고 생각하냐. 다른 사람의 지배를 받는다. 자기한테 독한 세끼가 자기한테 덜 독한 세끼 지배하고 사는게 세상이다. 자기 몸이 하라는데로 하면 나중에 지랄 같은 상황이 생겨. 니 몸을 니가 지배하라고. 공부하라면 공부하고. 운동하라면 운동하고. 깡다구로 사는 거다.
  3. 몰입 상태. 사람이 가장 행복한 순간을 느낄 때. 그때가 바로 몰입 상태 일 때라고 한다. 일이든 공부든 운동이든.
  4. 뜨거운거 잡고 손이 다 타기 전까지 참을 수 있나? 고통과 자극 속에 끈기와 깡다구로 버텨야해요.
  5. 귀신? 그런거 안 무서워. 극복해서 이길 생각을 하라. 도망가지 말고. 무언가가 내 앞을 와서 가로 막잖아 그럼 부딪혀서 해결하려고 노력해야지! 도망가지 말고 그 상황을 끝을 봐! 끝을 보라고. 도망가지 말고.
  6. 공부하는 주제에 왜 우울해 해. 앞으로 더 잘살라고 공부하는데 웃고 행복해야지. 지금 상황이 안 좋다고? 항상 안 좋을까? 과연 계속 안 좋을까? 도대체 어디까지 올려놓으려고 나를 이 밑에 까지 내려놓을까? 라고 생각해. 못알아 듣겠다. 운을 믿어라. 운이 굉장히 좋다고 믿어라. 이것이 운의 기운을 트게 하는 방법이다. 어차피 다 잘되어 있는 상황에서 타이머신 타고 놀러왔다고 생각해라.
  7. 눈빛이 얼마나 중요한지 아나? 눈빛은 정말 중요하다. 눈빛에 그 사람 인생이 담겨있다.
  8. 모르는 것은 절대로 이상한게 아니고 창피한게 아니다. 지금 약간 밀렸다고 쭈그러들 필요없다. 모르는 것은 물어보고 알아가면 되는 것이다.
  9. 껄딱 고개 처럼. 날이 밝기 전에 가장 어두운 것 처럼.
  10. 스스로에게 보상하지 마라. 보상은 사회가 해주는 거다. 어떤 절대자가 있으면 절대 용서하지 않을거야. 절대 스스로에게 보상하지 마라.
  11. 아니다 싶을 때, 옳지 않다 싶을 때는 하지마세요. 그게 얻는 것 같죠 훨씬 잃는게 많아요. 하지마라면 하지마.
  12. 갑자기 너무 힘들잖아 어떻게 해야 돼. 그냥해라. 둔하지 근데 둔한 사람이 이긴다. 성실히 꾸준히 하면 반드시 이긴다. 생각을 하지말고 따라해요. 그냥 하세요. 성공하고 싶니? 그럼 그냥 해라. 한결같이 하려고 노력하라. 노력을 습관적으로 고통스럽게 하세요. 힘들면 반복하래요 반복하면 힘들지 않대요. 몸이 시키는대로 하지 말고, 내가 몸에게 휴식을 부여해주어라. 내가 일어나라면 몸이 일어나야하고, 뛰어라하면 죽기 전까지 뛰어야 돼.

전한길 선생님 배움 정리

  1. 현재 태어난 것에 정말로 감사한거고. 대한민국에 태어난 것 만으로도 행복하고 감사한 것이다.
  2. 본인이 행복하기 위해서는 항상 감사해야한다. 감사하다. 훌륭하다. 신기하다. 위대하다.
  3. 돈보다 더 가치있는 건강과 청춘이 있음에 감사하고 긍정적으로 생각하라.
  4. 삶이라는 것은 항상 가시밭길 오르막길 내리막길이 있더라. 인생은 살아 볼만한 가치가 있다. 인생은 생방송이다. 고통도 실패도 성공도 즐긴다. 도화지에 나의 인생을 그려가는 중이다. 어떤 것이라도 다 소중한 것이고 즐겨야 한다. 재방송은 재미없다. 생방송은 재미있잖아?
  5. 대기만성. 큰 사람이 되기 위해서는 많은 노력과 시간이 필요함.
  6. 새옹지마. 미래는 절대 알 수 없고, 항상 긍정적으로 생각해야한다.

【Python-Module】 Mask-RCNN 수행하기 - OpenCV DNN 모듈

이전 Post를 통해서 Mask-RCNN의 이론에 대해서 공부했다. OpenCV DNN 모델을 사용해서 Mask-RCNN를 수행해보자.

Mask-RCNN 수행하기 - OpenCV DNN 모듈
OpenCV 사용과정 요약은 이전 Post 참조

주의 사항

  1. 지금까지와의 과정은 다르다. Segmentation 정보도 가져와야 한다.
    따라서 그냥 forward()하면 안되고, foward([‘detection_out_final’, ‘detection_masks’])를 해줘야 한다.
  2. Network에서 예측된 Mask정보를 원본 이미지 비율로 확장해야한다.
  3. 시각화를 해야하는데, 그냥 원본 이미지에 mask정보를 덮어버리면 안되고, 약간 투명하게 mask정보를 시각화해야한다.
  4. conda activate tf113 환경 사용하지
  5. /home/sb020518/DLCV/Segmentation/mask_rcnn 파일 참고할 것
  6. 여기에서는 cv2사용하는 것 말고, 전처리 및 데이터 사용에 대해서 깊게 살펴보기

0. OpenCV 파일 다운로드

  • Tensorflow에서 Pretrained 된 Inference모델(Frozen graph)와 환경파일을 다운로드 받은 후 이를 이용해 OpenCV에서 Inference 모델 생성
  • https://github.com/opencv/opencv/wiki/TensorFlow-Object-Detection-API 에 다운로드 URL 있음.
  • pretrained 모델은 http://download.tensorflow.org/models/object_detection/mask_rcnn_inception_v2_coco_2018_01_28.tar.gz 에서 다운로드 후 압축 해제
  • pretrained 모델을 위한 환경 파일은 https://raw.githubusercontent.com/opencv/opencv_extra/master/testdata/dnn/mask_rcnn_inception_v2_coco_2018_01_28.pbtxt 에서 다운로드. 하고 이름은 graph.pbtxt 로 바꿔주기
  • download된 모델 파일과 config 파일을 인자로 하여 inference 모델을 DNN에서 로딩함.
import cv2
import matplotlib.pyplot as plt
import numpy  as np
%matplotlib inline

img = cv2.imread('../../data/image/driving.jpg')
img_rgb = cv2.cvtColor(img, cv2.COLOR_BGR2RGB)

plt.figure(figsize=(12, 12))
plt.axis('off')
plt.imshow(img_rgb)

drawing

  • Tensorflow의 Object Detection 모델 Weight인 frozen_inference_graph와 graph.pbtxt를
  • 이용하여 Opencv 의 dnn Network 모델로 로딩
  • 이전에는 forward()만을 사용했지만 이제는 boxes, masks = cv_net.forward([‘detection_out_final’, ‘detection_masks’])
  • 과거 yolo를 사용했을때, cv_outs = cv_net_yolo.forward(outlayer_names) 를 사용했다.
  • forward([,])에 들어가야하는 인자는 layer name이 되어야 한다!!

1. 신경망 cv_net 구상하기

cv_net = cv2.dnn.readNetFromTensorflow('./pretrained/mask_rcnn_inception_v2_coco_2018_01_28/frozen_inference_graph.pb', 
                                     './pretrained/mask_rcnn_inception_v2_coco_2018_01_28/graph.pbtxt')

blob = cv2.dnn.blobFromImage(img , swapRB=True, crop=False)
cv_net.setInput(blob)

# Bounding box 정보는 detection_out_final layer에서 mask 정보는 detection_masks layer에서 추출. 
boxes, masks = cv_net.forward(['detection_out_final', 'detection_masks'])
layer_names = cv_net.getLayerNames()
outlayer_names = [layer_names[i[0] - 1] for i in cv_net.getUnconnectedOutLayers()]
print(type(layer_names),len(layer_names))
print(layer_names.index('detection_out_final'), layer_names.index('detection_masks'))
<class 'list'> 332
260 331
# coco dataset의 클래스 ID별 클래스명 매핑
labels_to_names_seq= {0:'person',1:'bicycle',2:'car',3:'motorcycle',4:'airplane',5:'bus',6:'train',7:'truck',8:'boat',9:'traffic light',
                    10:'fire hydrant',11:'street sign',12:'stop sign',13:'parking meter',14:'bench',15:'bird',16:'cat',17:'dog',18:'horse',19:'sheep',
                    20:'cow',21:'elephant',22:'bear',23:'zebra',24:'giraffe',25:'hat',26:'backpack',27:'umbrella',28:'shoe',29:'eye glasses',
                    30:'handbag',31:'tie',32:'suitcase',33:'frisbee',34:'skis',35:'snowboard',36:'sports ball',37:'kite',38:'baseball bat',39:'baseball glove',
                    40:'skateboard',41:'surfboard',42:'tennis racket',43:'bottle',44:'plate',45:'wine glass',46:'cup',47:'fork',48:'knife',49:'spoon',
                    50:'bowl',51:'banana',52:'apple',53:'sandwich',54:'orange',55:'broccoli',56:'carrot',57:'hot dog',58:'pizza',59:'donut',
                    60:'cake',61:'chair',62:'couch',63:'potted plant',64:'bed',65:'mirror',66:'dining table',67:'window',68:'desk',69:'toilet',
                    70:'door',71:'tv',72:'laptop',73:'mouse',74:'remote',75:'keyboard',76:'cell phone',77:'microwave',78:'oven',79:'toaster',
                    80:'sink',81:'refrigerator',82:'blender',83:'book',84:'clock',85:'vase',86:'scissors',87:'teddy bear',88:'hair drier',89:'toothbrush',
                    90:'hair brush'}


#masking 시 클래스별 컬러 적용
colors = list(
    [[0, 255, 0],
     [0, 0, 255],
     [255, 0, 0],
     [0, 255, 255],
     [255, 255, 0],
     [255, 0, 255],
     [80, 70, 180],
     [250, 80, 190],
     [245, 145, 50],
     [70, 150, 250],
     [50, 190, 190]] )
print('boxes shape:', boxes.shape, 'masks shape:', masks.shape)
# 각각이 무슨 역할인지는 바로 다음 코드 참조
# 지금 100개의 객체를 찾았다. confidence를 이용해서 몇개 거르긴 해야 함
boxes shape: (1, 1, 100, 7) masks shape: (100, 90, 15, 15)

2. 하나의 객체 Detect 정보 시각화 하기(꼭 알아두기)

  • 발견된 첫번째 객체에 대해서만, mask정보 추출 및 전처리

    drawing

numClasses = masks.shape[1]
numDetections = boxes.shape[2]

# opencv의 rectangle(), putText() API는 인자로 들어온 IMAGE array에 그대로 수정작업을 수행하므로 bounding box 적용을 위한 
# 별도의 image array 생성. 
draw_img = img.copy()

img_height = draw_img.shape[0]
img_width = draw_img.shape[1]

conf_threshold = 0.5
mask_threshold = 0.3

green_color=(0, 255, 0)
red_color=(0, 0, 255)

# 이미지를 mask 설명을 위해서 iteration을 한번만 수행. 
#for i in range(numDetections):
for i in range(1):
    box = boxes[0, 0, i] # box변수의 7개 원소를 가져온다.
    mask = masks[i]      # 90, 15, 15 shaep의 list. 90 : 각 클래스에 대해서 분류 이미지 depth, 15 x 15를 해당 객체 box size로 확장해야함
    score = box[2]       # 아하 box변수의 3번째 원소가 score값
    if score > conf_threshold:
        classId = int(box[1])             
        left = int(img_width * box[3])  # 정규화 되어 있으니까, w,h랑 곱해주는거 잊지말기
        top = int(img_height * box[4])
        right = int(img_width * box[5])
        bottom = int(img_height * box[6])
        
        # 이미지에 bounding box 그림 그리기
        text = "{}: {:.4f}".format(labels_to_names_seq[classId], score)
        cv2.rectangle(draw_img, (left, top), (right, bottom), green_color, thickness=2 )
        cv2.putText(draw_img, text, (left, top-3), cv2.FONT_HERSHEY_SIMPLEX, 0.3, red_color, 1)

        # mask 정보 처리하기
        classMask = mask[classId] # (15, 15)
        # 15 x 15 를 해당 객체 box size로 확장해야함
        scaled_classMask = cv2.resize(classMask, (right - left + 1, bottom - top + 1)) # (123, 224)
        # 지정된 mask Threshold 값 이상인지 True, False boolean형태의 mask 정보 생성. 
        s_mask_b = (scaled_classMask > mask_threshold) # bool형태의 (123, 224) 리스트 생성
        print('scaled mask shape:', s_mask_b.shape, '\nscaled mask pixel count:', s_mask_b.shape[0]*s_mask_b.shape[1],
              '\nscaled mask true shape:',s_mask_b[s_mask_b==True].shape, 
              '\nscaled mask False shape:', s_mask_b[s_mask_b==False].shape)
        # 원본 이미지의 bounding box 영역만 image 추출
        # 참고로 copy()해서 가져온게 아니기 때문에, before_mask_roi를 바꾸면 draw_img도 바뀐다
        before_mask_roi = draw_img[top:bottom+1, left:right+1]
        print('before_mask_roi:', before_mask_roi.shape)
scaled mask shape: (123, 224) 
scaled mask pixel count: 27552 
scaled mask true shape: (22390,) 
scaled mask False shape: (5162,)
before_mask_roi: (123, 224, 3)
  • 위 코드에서 얻은 첫번째 객체에 대한 마스크 정보를 이용해 시각화 준비.
vis_mask = (s_mask_b * 255).astype("uint8")  # true자리는 255로 만들어 준다

# mask정보를 덮어주는 작업을, cv2.bitwise_and 모듈을 사용해서 쉽게 한다.
# 객체가 있는 true자리만 그대로 놔두고, 아니면 검은색으로 바꿔버린다. vis_mask의 255가 검은색이다.
instance = cv2.bitwise_and(before_mask_roi, before_mask_roi, mask=vis_mask)

fig, (ax1, ax2, ax3, ax4) = plt.subplots(figsize=(8, 8), ncols=4, nrows=1)

ax1.set_title('network detected mask')
ax1.axis('off')
ax1.imshow(classMask)

ax2.set_title('resized mask')
ax2.axis('off')
ax2.imshow(scaled_classMask)


ax3.set_title('Before Mask ROI')
ax3.axis('off')
ax3.imshow(before_mask_roi)

ax4.set_title('after Mask ROI')
ax4.axis('off')
ax4.imshow(instance)

drawing

  • Detected된 object에 mask를 특정 투명 컬러로 적용후 시각화
  • 엄청 신기하게 하니까 알아두기
  • 이 코드를 보고 이해 안되면 최대한 이해해 보기

drawing

# 색갈을 하나 랜덤하게 골라서
colorIndex = np.random.randint(0, len(colors)-1)
color = colors[colorIndex]
after_mask_roi = draw_img[top:bottom+1, left:right+1][s_mask_b] # 필요한 부분만 때온다. 주의!! 2차원이 1차원으로 바뀐다! (depth정보는 그대로)
print(after_mask_roi.shape) 
# 이 코드를 계속 실행하면, 색을 덮고덮고덮고덮고를 반복한다. 랜덤으로 색이 바뀌는게 아니라...
draw_img[top:bottom+1, left:right+1][s_mask_b] = ([0.1*color[0], 0.1*color[1], 0.1*color[2]] + (0.5 * after_mask_roi)).astype(np.uint8)
# 2차원이든 1차원이든 쨋든 원하는 부분만 색을 바꿔준다. 투명 윈리는 위와 같다.

plt.figure(figsize=(6,6))
plt.axis('off')
plt.title('After Mask color')
plt.imshow(draw_img[top:bottom+1, left:right+1])
# 시각화 되는 건 draw_img의 일부분이지만, python variable immutable 때문에 draw_img의 전체도 바뀌어 있다

drawing

  • 굳이 할 필요 없지만, Detect된 Object에 contour 윤곽선 적용.
  • cv2.findContours, cv2.drawContours모듈을 사용하면 쉽다.
s_mask_i = s_mask_b.astype(np.uint8)
# https://datascienceschool.net/view-notebook/f9f8983941254a34bf0fee42c66c5539/ 에 이미지 컨투어 설명 있음 
contours, hierarchy = cv2.findContours(s_mask_i,cv2.RETR_TREE,cv2.CHAIN_APPROX_SIMPLE)
cv2.drawContours(draw_img[top:bottom+1, left:right+1], contours, -1, color, 1, cv2.LINE_8, hierarchy, 100)

plt.figure(figsize=(6,6))
plt.axis('off')
plt.title('After Mask color')
plt.imshow(draw_img[top:bottom+1, left:right+1])

drawing

3. 모든 객체에 대해서 mask정보 그려주기

  • 위에서 했던 작업 동일하게 반복 수행
numClasses = masks.shape[1]
numDetections = boxes.shape[2]

# opencv의 rectangle(), putText() API는 인자로 들어온 IMAGE array에 그대로 수정작업을 수행하므로 bounding box 적용을 위한 
# 별도의 image array 생성. 
draw_img = img.copy()

img_height = draw_img.shape[0]
img_width = draw_img.shape[1]
conf_threshold = 0.5
mask_threshold = 0.3

green_color=(0, 255, 0)
red_color=(0, 0, 255)

for i in range(numDetections):
    box = boxes[0, 0, i]
    mask = masks[i]
    score = box[2]
    if score > conf_threshold:
        classId = int(box[1])
        left = int(img_width * box[3])
        top = int(img_height * box[4])
        right = int(img_width * box[5])
        bottom = int(img_height * box[6])

        text = "{}: {:.4f}".format(labels_to_names_seq[classId], score)
        cv2.rectangle(draw_img, (left, top), (right, bottom), green_color, thickness=2 )
        cv2.putText(draw_img, text, (left, top-3), cv2.FONT_HERSHEY_SIMPLEX, 2, red_color, 1)

        classMask = mask[classId]
        scaled_classMask = cv2.resize(classMask, (right - left + 1, bottom - top + 1))
        s_mask_b = (scaled_classMask > mask_threshold)
        
        # 마스크 정보 투명하게 색 덮어 주기
        before_mask_roi = draw_img[top:bottom+1, left:right+1]
        colorIndex = np.random.randint(0, len(colors)-1)
        color = colors[colorIndex]
        after_mask_roi = draw_img[top:bottom+1, left:right+1][s_mask_b]
        draw_img[top:bottom+1, left:right+1][s_mask_b] = ([0.3*color[0], 0.3*color[1], 0.3*color[2]] + 0.6 * after_mask_roi).astype(np.uint8)
        
        # Detect된 Object에 윤곽선(contour) 적용. 
        s_mask_i = s_mask_b.astype(np.uint8)
        contours, hierarchy = cv2.findContours(s_mask_i,cv2.RETR_TREE,cv2.CHAIN_APPROX_SIMPLE)
        cv2.drawContours(draw_img[top:bottom+1, left:right+1], contours, -1, color, 1, cv2.LINE_8, hierarchy, 100)

plt.figure(figsize=(14, 14))
img_rgb = cv2.cvtColor(draw_img, cv2.COLOR_BGR2RGB)
plt.imshow(img_rgb)
plt.show()

drawing

4. 바로 위에서 한 작업. 함수화 및 이미지에 함수 사용

def get_box_info(box, img_width, img_height):
    
    classId = int(box[1])
    left = int(img_width * box[3])
    top = int(img_height * box[4])
    right = int(img_width * box[5])
    bottom = int(img_height * box[6])
    
    left = max(0, min(left, img_width - 1))
    top = max(0, min(top, img_height - 1))
    right = max(0, min(right, img_width - 1))
    bottom = max(0, min(bottom, img_height - 1))
    
    return classId, left, top, right, bottom

    
def draw_box(img_array, box, img_width, img_height, is_print=False):
    green_color=(0, 255, 0)
    red_color=(0, 0, 255)
    
    score = box[2]
    classId, left, top, right, bottom = get_box_info(box, img_width, img_height)
    text = "{}: {:.4f}".format(labels_to_names_seq[classId], score)
    
    if is_print:
        print("box:", box, "score:", score, "classId:", classId)
    
    cv2.rectangle(img_array, (left, top), (right, bottom), green_color, thickness=2 )
    cv2.putText(img_array, text, (left, top-3), cv2.FONT_HERSHEY_SIMPLEX, 0.5, red_color, thickness=1)
    
    return img_array
    
def draw_mask(img_array, box, mask, img_width, img_height, mask_threshold, is_print=False):
        
        classId, left, top, right, bottom = get_box_info(box, img_width, img_height)
        classMask = mask[classId]
        
        # 원본 이미지의 object 크기에 맞춰 mask 크기 scale out 
        scaled_classMask = cv2.resize(classMask, (right - left + 1, bottom - top + 1))
        s_mask_b = (scaled_classMask > mask_threshold)
        before_mask_roi = img_array[top:bottom+1, left:right+1]
        
        # mask를 적용할 bounding box 영역의 image 추출하고 투명 color 적용. 
        colorIndex = np.random.randint(0, len(colors)-1)
        color = colors[colorIndex]
        after_mask_roi = img_array[top:bottom+1, left:right+1][s_mask_b]
        img_array[top:bottom+1, left:right+1][s_mask_b] = ([0.3*color[0], 0.3*color[1], 0.3*color[2]] + 0.6 * after_mask_roi).astype(np.uint8)
        
        # Detect된 Object에 윤곽선(contour) 적용. 
        s_mask_i = s_mask_b.astype(np.uint8)
        contours, hierarchy = cv2.findContours(s_mask_i,cv2.RETR_TREE,cv2.CHAIN_APPROX_SIMPLE)
        cv2.drawContours(img_array[top:bottom+1, left:right+1], contours, -1, color, 1, cv2.LINE_8, hierarchy, 100)
        
        return img_array
  • 바로 위에서 만든 함수 사용해서, detect_image_mask_rcnn 함수 만들기
import time

def detect_image_mask_rcnn(cv_net, img_array, conf_threshold, mask_threshold, use_copied_array, is_print=False):
    
    draw_img = None
    if use_copied_array:
        draw_img = img_array.copy()
        #draw_img = cv2.cvtColor(draw_img, cv2.COLOR_BGR2RGB)
    else:
        draw_img = img_array
        
    start_time = time.time()
    
    blob = cv2.dnn.blobFromImage(img_array, swapRB=True, crop=False)
    cv_net.setInput(blob)
    boxes, masks = cv_net.forward(['detection_out_final', 'detection_masks'])
    
    inference_time = time.time() - start_time
    if is_print:
        print('Segmentation Inference time {0:}'.format(inference_time))

    numClasses = masks.shape[1]
    numDetections = boxes.shape[2]

    img_height = img_array.shape[0]
    img_width = img_array.shape[1]
    
    for i in range(numDetections):
        box = boxes[0, 0, i]
        mask = masks[i]
        score = box[2]
        #print("score:", score)
        if score > conf_threshold:
            draw_box(img_array , box, img_width, img_height, is_print=is_print)
            draw_mask(img_array, box, mask, img_width, img_height, mask_threshold, is_print=is_print)
    
    return img_array
labels_to_names_seq = {0:'person',1:'bicycle',2:'car',3:'motorcycle',4:'airplane',5:'bus',6:'train',7:'truck',8:'boat',9:'traffic light',
                    10:'fire hydrant',11:'street sign',12:'stop sign',13:'parking meter',14:'bench',15:'bird',16:'cat',17:'dog',18:'horse',19:'sheep',
                    20:'cow',21:'elephant',22:'bear',23:'zebra',24:'giraffe',25:'hat',26:'backpack',27:'umbrella',28:'shoe',29:'eye glasses',
                    30:'handbag',31:'tie',32:'suitcase',33:'frisbee',34:'skis',35:'snowboard',36:'sports ball',37:'kite',38:'baseball bat',39:'baseball glove',
                    40:'skateboard',41:'surfboard',42:'tennis racket',43:'bottle',44:'plate',45:'wine glass',46:'cup',47:'fork',48:'knife',49:'spoon',
                    50:'bowl',51:'banana',52:'apple',53:'sandwich',54:'orange',55:'broccoli',56:'carrot',57:'hot dog',58:'pizza',59:'donut',
                    60:'cake',61:'chair',62:'couch',63:'potted plant',64:'bed',65:'mirror',66:'dining table',67:'window',68:'desk',69:'toilet',
                    70:'door',71:'tv',72:'laptop',73:'mouse',74:'remote',75:'keyboard',76:'cell phone',77:'microwave',78:'oven',79:'toaster',
                    80:'sink',81:'refrigerator',82:'blender',83:'book',84:'clock',85:'vase',86:'scissors',87:'teddy bear',88:'hair drier',89:'toothbrush',
                    90:'hair brush'}
  • 위에서 만든 함수를 사용해서 instance segmentation 수행하기
img = cv2.imread('../../data/image/baseball01.jpg')

cv_net = cv2.dnn.readNetFromTensorflow('./pretrained/mask_rcnn_inception_v2_coco_2018_01_28/frozen_inference_graph.pb', 
                                     './pretrained/mask_rcnn_inception_v2_coco_2018_01_28/graph.pbtxt')

img_detected = detect_image_mask_rcnn(cv_net, img, conf_threshold=0.5, mask_threshold=0.3, use_copied_array=True, is_print=True)

img_rgb = cv2.cvtColor(img_detected, cv2.COLOR_BGR2RGB)
plt.figure(figsize=(12, 12))
plt.imshow(img_rgb)

  • 위에서 만든 함수를 사용해서 instance segmentation 수행하기
import cv2
import matplotlib.pyplot as plt
%matplotlib inline

wick_img = cv2.imread('../../data/image/john_wick01.jpg')

wick_img_detected = detect_image_mask_rcnn(cv_net, wick_img, conf_threshold=0.5, mask_threshold=0.3, use_copied_array=True, is_print=True)

wick_img_rgb = cv2.cvtColor(wick_img_detected, cv2.COLOR_BGR2RGB)
plt.figure(figsize=(12, 12))
plt.imshow(wick_img_rgb)

drawing

5. 동영상에 Segmentation 적용. 위에서 만든 함수 사용

def detect_video_mask_rcnn(cv_net, input_path, output_path, conf_threshold, mask_threshold,  is_print):
    
    cap = cv2.VideoCapture(input_path)

    codec = cv2.VideoWriter_fourcc(*'XVID')

    vid_size = (round(cap.get(cv2.CAP_PROP_FRAME_WIDTH)),round(cap.get(cv2.CAP_PROP_FRAME_HEIGHT)))
    vid_fps = cap.get(cv2.CAP_PROP_FPS)

    vid_writer = cv2.VideoWriter(output_path, codec, 24, vid_size) 

    frame_cnt = int(cap.get(cv2.CAP_PROP_FRAME_COUNT))
    print('총 Frame 갯수:', frame_cnt, )

    frame_index=0
    while True:
        hasFrame, img_frame = cap.read()
        frame_index += 1
        if not hasFrame:
            print('더 이상 처리할 frame이 없습니다.')
            break
        print("frame index:{0:}".format(frame_index), end=" ")
        returned_frame = detect_image_mask_rcnn(cv_net, img_frame, conf_threshold=conf_threshold,
                                                mask_threshold=mask_threshold,use_copied_array=False, is_print=is_print)
        vid_writer.write(returned_frame)
    # end of while loop

    vid_writer.release()
    cap.release()
cv_net = cv2.dnn.readNetFromTensorflow('./pretrained/mask_rcnn_inception_v2_coco_2018_01_28/frozen_inference_graph.pb', 
                                     './pretrained/mask_rcnn_inception_v2_coco_2018_01_28/graph.pbtxt')

detect_video_mask_rcnn(cv_net, '../../data/video/John_Wick_small.mp4', '../../data/output/John_Wick_mask_01.avi',
                      conf_threshold=0.5, mask_threshold=0.3, is_print=True)
!gsutil cp ../../data/output/John_Wick_mask_01.avi gs://my_bucket_dlcv/data/output/John_Wick_mask_01.avi

Pagination


© All rights reserved By Junha Song.